Patio Installation: A Complete Step-by-Step Guide
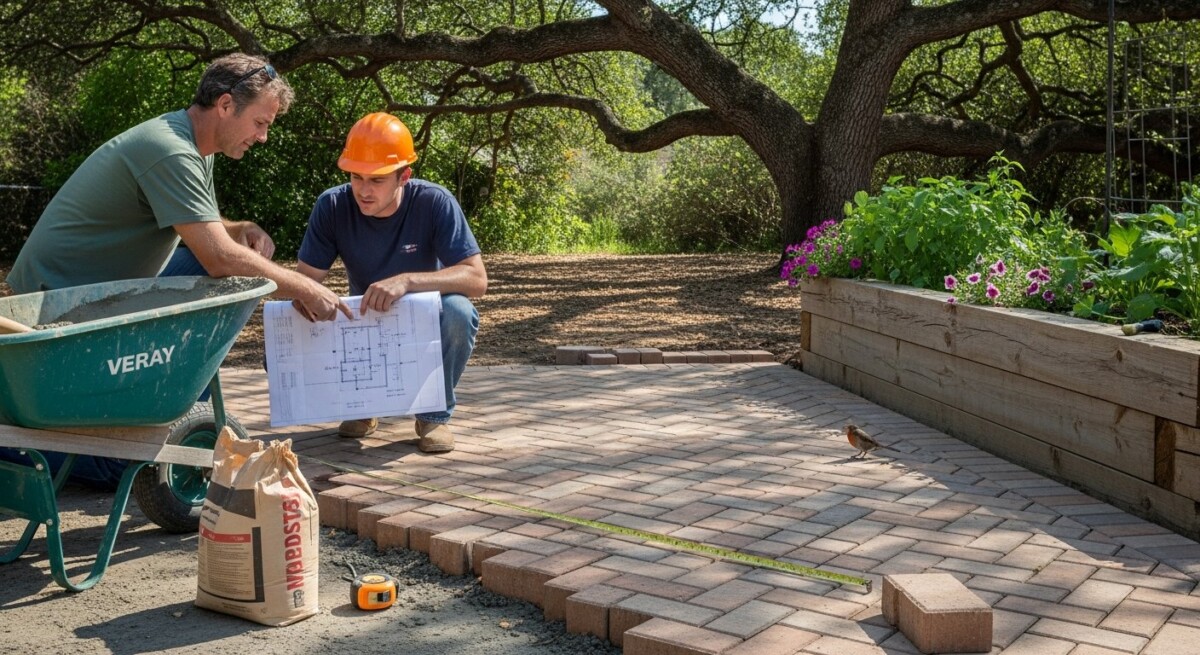
Adding a patio to your home is one of the most rewarding outdoor projects you can undertake. It extends your living space, increases property value, and creates a dedicated area for dining, relaxing, or entertaining. But a successful patio installation requires careful planning, the right materials, and skilled execution. Whether you envision a simple concrete slab or a multi-level paver paradise, understanding the full process helps you avoid costly mistakes and achieve lasting results. This guide walks you through every phase, from initial design to final finishing, and shows you how connecting with experienced contractors can turn your vision into reality.
Planning Your Patio Installation
The most important step in any patio installation happens before a single shovel touches the ground. Thorough planning saves time, money, and frustration. Start by defining the purpose of your patio: will it host large gatherings, serve as a quiet reading nook, or surround a future outdoor kitchen? The intended use directly influences size, shape, and material choices. Next, assess your yard’s topography, drainage patterns, and sun exposure. A low-lying area may require additional grading or a raised base to prevent water pooling. Mark utility lines before digging, and always check local building codes for setback requirements, permit rules, and structural guidelines. You can often consult with a contractor during the planning stage to identify potential issues early.
After defining your goals and site conditions, create a rough budget. Remember that a patio installation involves more than just materials: you need to account for excavation, base layers, edging, sealing, and labor. A typical concrete patio ranges from $6 to $15 per square foot, while natural stone or interlocking pavers can cost $12 to $30 per square foot or more. Having a realistic budget helps you narrow material options and contractor bids. At this stage, it is wise to gather multiple quotes from reputable professionals. Platforms like USremodel make this easy by connecting you with vetted contractors who can provide free, customized estimates for your project.
Choosing the Right Patio Materials
Your choice of material defines the look, durability, and maintenance needs of your patio. Each option has trade-offs between cost, lifespan, and visual appeal. The following list summarizes the most common patio materials and their key characteristics:
- Concrete: Affordable and versatile, concrete can be stamped, stained, or textured to mimic stone or tile. It is durable but prone to cracking if not properly installed with control joints.
- Pavers (concrete or brick): Interlocking pavers offer excellent strength and easy repair because individual units can be replaced. They require a stable base and edge restraints to prevent shifting.
- Natural stone: Materials like flagstone, slate, and travertine deliver a high-end, unique appearance. They are durable but more expensive and often need sealing to resist stains and weathering.
- Gravel or decomposed granite: A budget-friendly, permeable option that drains well. It works best for casual patios but may shift over time and require periodic replenishment.
Consider your climate when selecting materials. In freeze-thaw regions, choose pavers or stone with proper base drainage to avoid frost heave. In hot, sunny areas, light-colored materials stay cooler underfoot. Also factor in maintenance: concrete may need resealing every few years, while pavers typically require only occasional sand refilling and weed control. Discuss material options with your contractor to match your aesthetic preferences with practical long-term care.
Steps in a Professional Patio Installation
A typical patio installation follows a systematic sequence that ensures structural integrity and a finished surface that will last for decades. While the exact steps vary by material, the general process remains consistent across most projects. Below is a numbered outline of the core stages:
- Site preparation and excavation: The area is marked, grass is removed, and soil is excavated to a depth of 6 to 12 inches depending on base requirements. Proper grading directs water away from the house.
- Base layer installation: A compacted layer of crushed stone or gravel (typically 4 to 6 inches thick) is spread and tamped down. This base provides stability and drainage.
- Edge restraints and forms: Metal, plastic, or wood edging is installed to contain the base and paving material. For poured concrete, wooden forms are set to define the slab shape.
- Sand or bedding layer: A 1-inch layer of coarse sand or stone dust is screeded flat to create a level surface for pavers or stone. For concrete, a vapor barrier may be laid before pouring.
- Installing the surface material: Pavers are laid in the desired pattern, concrete is poured and finished, or stone pieces are dry-laid and fitted. This step requires careful alignment and leveling.
- Compaction and joint filling: For pavers, a plate compactor settles them into the sand. Polymeric sand is swept into joints and misted to harden. Concrete is cured with moisture retention techniques.
- Sealing and finishing touches: A sealer protects the surface from stains and UV damage. Final cleanup, landscaping around the patio, and any additional features like steps or lighting complete the project.
Each stage demands precision. Rushing the base preparation, for example, often leads to sinking or uneven pavers within a year. Professional contractors have the equipment and experience to compact layers correctly and ensure the finished patio meets building standards. When you hire through USremodel, you can compare proposals that outline exactly how each step will be executed, giving you confidence in the quality of workmanship.
Hiring a Contractor for Patio Installation
While some homeowners attempt DIY patio installation, the physical demands and technical aspects make professional help a wise investment for most people. A contractor brings heavy machinery, knowledge of soil conditions, and the ability to handle unexpected obstacles like buried roots or poor drainage. When vetting candidates, ask about their experience with your chosen material and request references from recent patio projects. Verify licensing and insurance to protect yourself from liability in case of accidents. Also, ask for a detailed written contract that includes material specifications, timeline, payment schedule, and warranty terms.
The best way to find qualified professionals is to compare multiple bids. USremodel streamlines this process by allowing you to submit your project details once and receive free quotes from several independent contractors in your area. This platform focuses on connecting homeowners with reliable service providers for remodeling, renovation, and repair projects, including patio installation. You can review contractor profiles, read customer feedback, and choose the team that best fits your budget and vision. By comparing offers side by side, you avoid the pressure of a single sales pitch and secure competitive pricing.
Cost Factors and Budgeting Tips
Understanding what drives the cost of a patio installation helps you make informed decisions without surprises. The largest variables are material choice, patio size, site complexity, and labor rates in your region. A simple, square concrete patio on flat ground costs far less than a curved, multi-level paver patio with retaining walls, built-in seating, and lighting. Additional factors include demolition of an existing patio, tree removal, or the need for heavy grading. Permits also add fees that vary by municipality.
To keep your project on budget, prioritize your must-haves versus nice-to-haves. For example, you might choose a standard concrete slab with a broom finish now and add stamped overlays later. Alternatively, source materials during off-season sales or consider mid-range pavers that mimic natural stone at a lower price. Do not sacrifice base quality or compaction to save money, as poor foundations lead to costly repairs. Many contractors offer financing options, and USremodel can help you find service providers who offer flexible payment plans. Requesting at least three quotes ensures you see the market range and can negotiate confidently.
Integrating Your Patio With the Landscape
A well-designed patio does not exist in isolation. Its success depends on how it connects with your home’s architecture and surrounding yard. Think about transitions: a step down from the house, a pathway leading to the garden, or a seamless blend with an existing deck. Choose colors and textures that complement your home’s exterior. For instance, warm-toned pavers pair well with brick facades, while gray flagstone suits modern stucco homes. Landscaping elements like planters, retaining walls, and outdoor lighting enhance the patio’s usability after sunset. Plan drainage paths so water does not pool near the foundation or onto neighboring properties.
When working with a contractor, share photos of styles you like and discuss how the patio will be used year-round. In warmer climates, adding a pergola or retractable awning provides shade. In cooler areas, a fire pit or outdoor heater extends the season. Professional contractors can also advise on permeable paving options to manage stormwater runoff. By integrating the patio installation into a complete outdoor design, you create a cohesive space that feels like a natural extension of your home.
Maintenance and Longevity
Proper maintenance extends the life of your patio and keeps it looking fresh. For concrete, seal the surface every two to three years and clean stains promptly with a mild detergent. Pavers require periodic sweeping of joints and reapplication of polymeric sand if gaps appear. Natural stone may need resealing every one to three years depending on porosity. Weed prevention is easier with a proper base and edge restraints, but occasional removal by hand or with a weed killer is typical. In winter, avoid using metal shovels or deicing salts that can damage surfaces; use plastic tools and sand instead.
With routine care, a professionally installed patio can last 20 to 30 years or more. The key is addressing small issues quickly: a cracked paver, a low spot where water collects, or a lifting edge. Most contractors offer a warranty on labor, and USremodel helps you connect with service providers who stand behind their work. By choosing quality materials and experienced installers, your patio becomes a durable, low-maintenance asset that adds enjoyment and value to your home for decades.
Ready to start your outdoor transformation? Begin by outlining your ideal patio and then request free quotes from trusted contractors through USremodel. Comparing multiple proposals ensures you get the best combination of price, expertise, and design for your property. With the right plan and a skilled team, your patio installation will be a smooth, rewarding process that delivers a beautiful outdoor living space you and your family will love.