Vinyl Flooring Installation: A Complete Guide for Homeowners
You’ve chosen beautiful new vinyl flooring for your home. It promises durability, easy cleaning, and a fresh new look. But now comes the big question: how do you ensure it’s installed correctly? A poor installation can lead to bumps, gaps, and premature wear, turning your dream upgrade into a daily frustration. Getting it right from the start is the key to enjoying your floors for years to come.
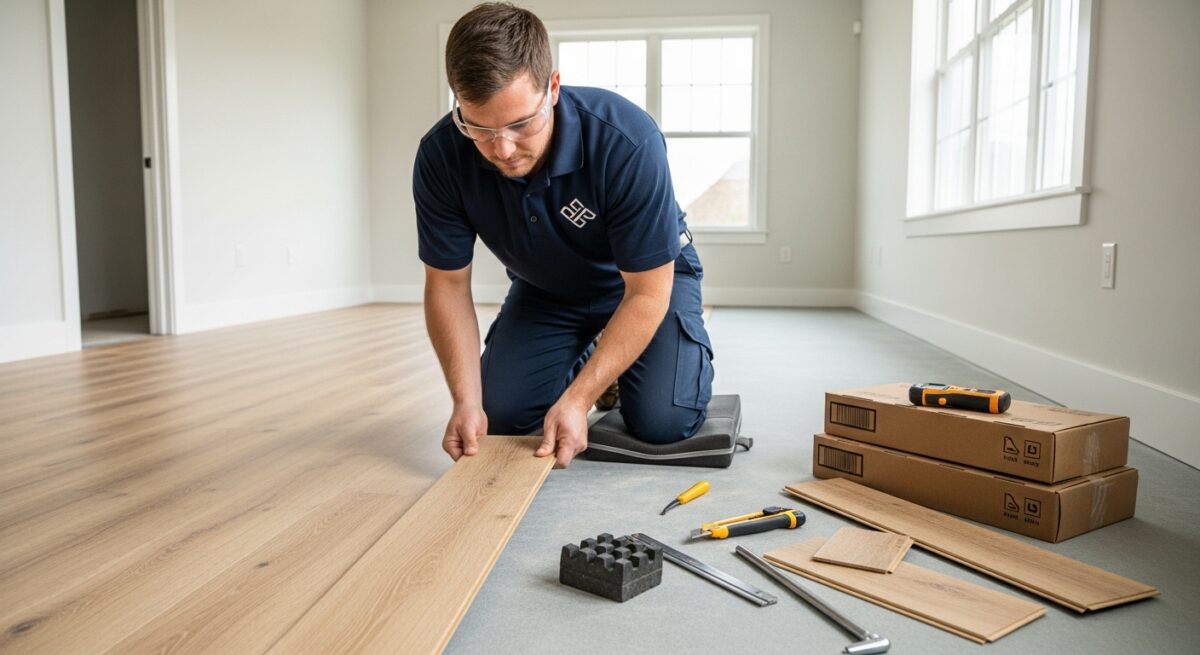
Understanding Vinyl Flooring Installation
Vinyl flooring installation is the process of preparing your subfloor and securely fitting vinyl planks, tiles, or sheets into your space. It’s more than just clicking pieces together; it’s a skilled craft that ensures a level, stable, and beautiful finish.
There are different types of vinyl, like Luxury Vinyl Plank (LVP) and Luxury Vinyl Tile (LVT), which often use a click-lock floating floor system. Vinyl sheets require a different method, often involving adhesive. The right approach depends on your product, your subfloor, and the room itself. For a broader look at material choices, our guide on the best flooring options for your home can help you compare.
The Core Principles of a Good Install
Every successful installation rests on two non-negotiable principles: a perfectly prepared subfloor and proper acclimation of the flooring. Skipping these steps is the most common cause of problems down the line.
Why Proper Installation Matters for Homeowners
Doing it right matters because it protects your investment. A professionally installed vinyl floor will lie flat, feel solid underfoot, and maintain its waterproof seals. This means no trip hazards, no moisture sneaking underneath, and no planks popping up unexpectedly.
The benefits extend to your home’s value and your daily life. A flawless installation enhances the room’s appearance, makes cleaning a breeze, and provides a durable surface that can handle pets, kids, and high traffic. Conversely, a DIY job gone wrong can void warranties, lead to costly repairs, and force you to replace the flooring much sooner than you planned.
Don’t risk your flooring investment. Call us at (123) 456-7890 for a precise, guaranteed installation that lasts.
Common Installation Issues and Their Causes
Many vinyl floor problems can be traced back to the installation day. Understanding these common pitfalls helps you see why professional skill is so valuable.
Buckling and gaps are frequent complaints. Buckling happens when the floor expands but has no room to move, often because it was installed too tightly against walls. Gaps appear when planks contract, usually due to improper acclimation or a subfloor that wasn’t level. Peaking at the seams occurs when the click-lock joints aren’t fully engaged or when an underlayment is misused.
- Uneven or Bouncy Feel: Caused by an uneven subfloor or debris left underneath.
- Visible Seams or Peaking: Often from improper locking or subfloor imperfections.
- Moisture Damage: Can occur if moisture barriers are skipped in basements or over concrete.
- Molding and Trim Issues: Gaps or poorly fitted trim take away from the finished look.
How Professionals Ensure a Flawless Installation
A professional installer follows a meticulous, step-by-step process designed to avoid every common issue. It starts with a thorough assessment of your space and subfloor condition.
First, they prepare the subfloor, making it clean, dry, and perfectly level. They may use self-leveling compound or underlayment to correct any issues. Next, they acclimate the flooring in your home for at least 48 hours. The installation itself involves precise cutting, careful locking of each plank, and strategic staggering of seams for strength and aesthetics.
- Site Inspection & Measurement: Checking for moisture, level, and room layout.
- Subfloor Preparation: The most critical step for long-term success.
- Precise Installation: Using the right tools and techniques for your specific vinyl product.
- Finishing Touches: Installing molding, trim, and transitions for a perfect seal and look.
Ready for a perfectly level, gap-free floor? Contact our installation experts at (123) 456-7890 today for a free estimate.
Signs Your Vinyl Floor Was Installed Incorrectly
Sometimes, problems show up weeks or months after installation. Knowing the warning signs can help you address issues before they cause permanent damage.
Listen and feel as you walk across the floor. Do you hear crackling or popping noises? Does the floor feel soft or flexible in spots? These are telltale signs of subfloor problems or improper locking. Visually inspect the edges and seams regularly.
- Planks Lifting or Peaking: Edges that are no longer flush.
- Visible Gaps Between Planks: Especially gaps that weren’t there initially.
- Moldings Pulling Away: Baseboards or quarter-round separating from the wall or floor.
- Discoloration or Warping: Potential signs of moisture infiltration from below.
Cost Factors and What Affects Pricing
The cost of vinyl flooring installation isn’t a single flat rate. Several honest factors influence the final price, understanding them helps you budget realistically.
The biggest factors are the size and complexity of the room. A simple square bedroom is more straightforward than a kitchen with many cabinets, corners, and appliances. The condition of your existing subfloor is another major cost driver. Significant leveling or repair work will add to the project time and materials. Finally, the type of vinyl and your location will influence the overall cost, much like the variables involved in a major project such as professional roof installation and repair.
Get a clear, upfront quote for your specific project. Call (123) 456-7890 to discuss your space and get a detailed estimate.
How To Choose the Right Installation Professional
Choosing the right installer is as important as choosing the right flooring. Look for a service with a proven track record in vinyl specifically.
Always ask for proof of licensing and insurance to protect your home. Read reviews and ask for examples of past work. A reputable professional will offer a clear, written estimate, explain the process, and provide a warranty on their labor. This due diligence is similar to what you should seek for any major home service, from door installation to major renovations.
- Check for vinyl-specific experience and certifications.
- Ensure they offer a labor warranty separate from the product warranty.
- Choose someone who communicates clearly and answers all your questions.
Long-Term Benefits for Your Home
Investing in a professional vinyl flooring installation pays dividends for the life of your home. You gain peace of mind knowing the job was done to the highest standard.
The long-term benefits include enhanced durability, as properly installed floors resist wear and tear far better. You maintain the full manufacturer’s warranty, which often requires professional installation. Your home is safer without tripping hazards, and the beautiful, seamless finish adds to your comfort and your property’s appeal for years to come.
Frequently Asked Questions
How long does vinyl flooring installation take?
For an average room, professional installation typically takes one to two days. This includes preparation, acclimation, the install itself, and clean-up. Larger or more complex areas may take longer.
Can vinyl plank flooring be installed over existing tile?
Yes, it often can be, if the tile is firmly attached, level, and clean. A professional will assess the condition and may use an underlayment to create a smooth surface for the vinyl planks to lock onto.
Do I need to move all my furniture before installation?
Yes. For a proper installation, the room needs to be completely empty. Your installation team can often handle moving large appliances for an additional fee, but all personal items, furniture, and decor should be removed.
What is the most important step in the installation process?
Subfloor preparation is absolutely critical. No matter how expensive the vinyl, if it’s installed over an uneven, dirty, or moist subfloor, problems are very likely to occur.
How long do I have to wait to use the room after installation?
For click-lock floating floors, you can walk on them immediately. For glue-down installations, you may need to wait 24-48 hours for the adhesive to fully cure before moving furniture back in.
Will installers remove and dispose of my old flooring?
Most professional services include old flooring removal and disposal in their quote. Always confirm this during the estimate phase, as it is a standard but important part of the service.
Can vinyl flooring be installed in bathrooms or basements?
Absolutely. Vinyl is an excellent choice for moisture-prone areas. Professional installers will take extra precautions, such as ensuring proper moisture barriers are in place, especially over concrete subfloors.
What is the difference between a floating and glue-down installation?
A floating floor locks together but is not attached to the subfloor. Glue-down vinyl is fully adhered with a special adhesive. The best method depends on your vinyl product, subfloor, and the room’s use.
Your new vinyl flooring should be a source of joy, not worry. By trusting a skilled professional with the installation, you secure the beauty, functionality, and value of your investment from day one. A flawless installation is the foundation for years of satisfaction with your updated home.

About Kassav


