
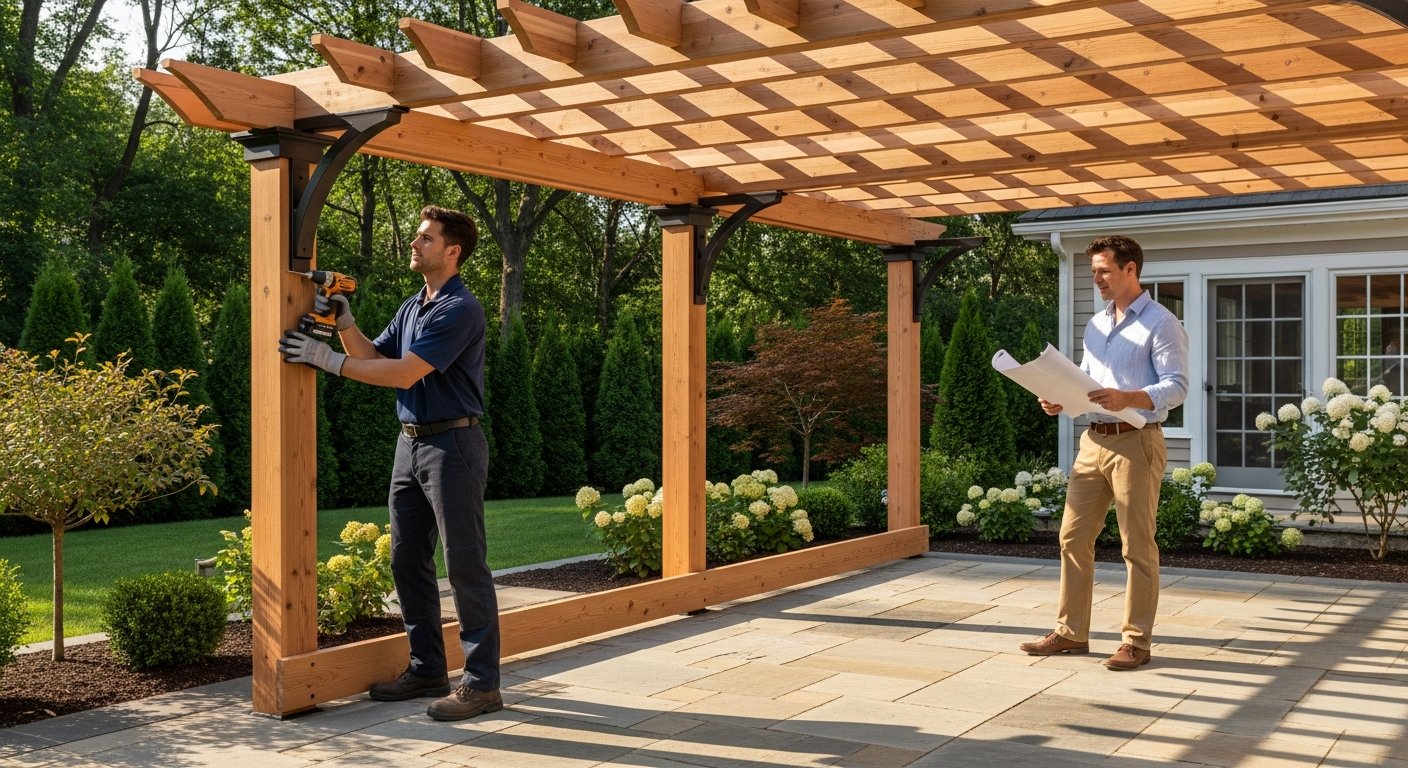
Pergola Installation: A Homeowner's Practical Guide
Discover how to plan a successful pergola installation, from choosing materials and permits to DIY vs. hiring a pro, and start your outdoor upgrade today.
By Alexia Mabel
Learn more about Patio Cover and Awning Services for guides, costs, and what to expect.
Compare Patio Cover and Awning Services Pros Near You

Enter your ZIP code to compare top-rated local professionals and request free quotes.
Adding a pergola to your backyard can transform an ordinary outdoor space into a shaded retreat, an entertainment hub, or a quiet reading nook. But before you start shopping for materials or sketching layouts, you need a clear plan. A successful pergola installation depends on careful site preparation, the right permits, and choosing a structure that matches your home's architecture and your local climate. This guide walks you through every stage of the process, from initial planning to final finishing touches, so you can make informed decisions and avoid costly mistakes.
Why a Pergola Is a Smart Investment
A pergola does more than just add visual appeal. It extends your living space outdoors, provides partial shade, and can increase your property's value. According to recent home improvement reports, outdoor living projects often recoup a significant portion of their cost at resale. Beyond the financial angle, a pergola creates a defined area for dining, lounging, or gardening, making your yard feel like an intentional extension of your home.
However, the benefits depend heavily on the quality of the installation. A poorly anchored pergola can become a safety hazard in high winds, and an improperly sealed wood structure can rot within a few seasons. That is why homeowners should approach this project with the same seriousness as an interior remodel. You can either tackle it as a DIY weekend project or hire a professional, but either way, you need to understand the fundamentals.
Planning Your Pergola Installation
Before you break ground, you need to answer several key questions. What is the primary purpose of your pergola? Will it cover a patio, a deck, or a grassy area? Do you want it attached to your house or freestanding? These choices affect everything from footing depth to material selection.
Choosing the Right Location
The location determines how much sun you get, how the structure relates to your home, and how much work the installation will be. Attached pergolas, which connect to an exterior wall, are often easier to access and can create a seamless transition from indoors to outdoors. Freestanding pergolas offer more flexibility in placement, but they require additional structural support and more extensive foundation work.
Consider the sun's path across your yard throughout the day. A pergola on the west side of your home will provide afternoon shade, which is ideal for hot climates. If you want morning shade for breakfast outdoors, choose a different orientation. Also, check for overhead power lines, underground utilities, and tree roots that could interfere with digging.
Permits and Local Regulations
Most municipalities require a building permit for any permanent structure, including pergolas. Permit requirements vary widely, so contact your local building department before you start. They will tell you about setback requirements, height limits, and structural load standards for your area. Skipping the permit can lead to fines, forced removal, or problems when you sell your home.
If you are working with a contractor, they will typically handle the permit process as part of their service. If you are doing the installation yourself, you will need to submit plans and pass inspections. The cost of a permit is usually modest compared to the overall project, and it protects you by ensuring the structure is safe.
Selecting Materials for Longevity and Style
The material you choose for your pergola affects its appearance, maintenance requirements, and lifespan. Here are the most common options:
- Wood: Cedar, redwood, and pressure-treated pine are popular for their natural beauty and affordability. They require regular staining or sealing to prevent rot and insect damage.
- Vinyl: Low maintenance and resistant to moisture, vinyl pergolas are easy to clean and come in several colors. They may not have the same upscale feel as wood, but they are durable.
- Aluminum: Lightweight, strong, and rust-proof, aluminum pergolas often feature powder-coated finishes that mimic wood grain. They require very little upkeep and can support heavy climbing plants.
- Fiberglass: A premium option that offers high strength and design flexibility. Fiberglass pergolas are resistant to cracking, warping, and fading, but they are more expensive.
When selecting materials, think about your local climate. In humid or rainy regions, choose materials that resist moisture. In areas with heavy snow or strong winds, you need a structure that can handle the load. Also, consider how the pergola will look with your home's exterior. A wood pergola might complement a rustic cabin, while a sleek aluminum design suits a modern house.
The Installation Process: Step by Step
Once you have your plan, permits, and materials, you can begin the installation. The process generally follows these steps, though specifics vary based on your design and site conditions.
1. Mark the Layout and Dig Footings
Start by marking the exact position of each post using stakes and string, then dig holes for the concrete footings. The depth and diameter of these holes depend on your local frost line and the size of your pergola. In cold climates, footings must extend below the frost line to prevent shifting. Use a post-hole digger or an auger for efficiency, and make sure the holes are level with each other.
2. Set Posts and Pour Concrete
Place galvanized steel post anchors or brackets into the wet concrete to secure the posts. Allow the concrete to cure for at least 24 to 48 hours before attaching the posts. Alternatively, you can set the posts directly into the concrete, but this makes future replacement harder. Use a level to ensure each post is perfectly vertical, and temporarily brace them with boards until the concrete hardens.
3. Attach the Beams and Rafters
With the posts firmly in place, you can install the horizontal beams that span the top of the structure. For attached pergolas, you will also need a ledger board secured to the house wall. Use stainless steel or galvanized hardware to connect the beams to the posts, and then place the rafters across the beams at even intervals. Secure each rafter with appropriate screws or brackets, and double-check that everything is square and level.
4. Add Finishing Touches
Once the main frame is up, you can add decorative elements like corbels, lattice panels, or a retractable canopy. For wood pergolas, apply a protective stain or sealant to guard against moisture and UV damage. For vinyl or aluminum, clean the surfaces and check that all fasteners are tight. Finally, consider adding outdoor lighting, climbing plants, or outdoor curtains to enhance the space.
DIY vs. Hiring a Professional
Pergola installation is a moderately complex project that some experienced DIYers can handle. If you have basic carpentry skills, you can save money on labor by doing it yourself, especially with a prefabricated kit. However, there are several reasons to hire a professional. First, a contractor will ensure the structure meets local building codes and is safe. Second, they have the tools and experience to handle challenges like uneven ground, difficult soil, or complex designs. Third, they can complete the job faster, often in a few days versus several weekends.
If you decide to hire a pro, use a platform like USremodel to connect with vetted contractors in your area. You can compare quotes, read reviews, and choose the one that fits your budget and timeline. This approach gives you peace of mind, knowing that the installation is done correctly and that you have recourse if issues arise.
Cost Considerations and Budgeting
The cost of a pergola installation varies widely based on size, materials, labor, and your location. A small DIY kit might cost under $1,000, while a custom cedar pergola with professional installation could run $5,000 to $10,000 or more. Here is a rough breakdown of expenses:
- Materials: $500 to $5,000 depending on the type and quality.
- Labor: $1,500 to $4,000 if you hire a professional.
- Permits: $50 to $500, depending on your municipality.
- Site preparation: $200 to $1,000 for leveling, concrete, or demolition of an old structure.
When budgeting, also set aside 10 to 15 percent for unexpected costs, such as extra concrete, additional hardware, or repairs to your existing patio or deck. If you are financing the project, check whether your contractor offers payment plans, or consider a home improvement loan.
Maintenance Tips to Extend the Life of Your Pergola
Proper maintenance keeps your pergola looking great and ensures it lasts for decades. For wood pergolas, inspect the structure annually for cracks, splinters, or signs of rot. Clean the surfaces with a mild detergent and water, then reapply a wood preservative or stain every two to three years. For vinyl or aluminum, simply wipe down with soap and water, and check that fasteners remain tight.
Also, consider how your pergola interacts with the elements. If you live in a windy area, make sure the structure is anchored securely. If you have climbing plants, prune them regularly to prevent excessive weight on the rafters, and ensure they do not trap moisture against the wood.
Enhancing Your Pergola with Accessories
Once the structure is installed, you can customize it to suit your lifestyle. A retractable canopy or shade sails provide adjustable sun protection, while outdoor curtains offer privacy and block wind. String lights, lanterns, or built-in LED fixtures create a cozy evening atmosphere. You might also add a ceiling fan, an outdoor speaker system, or a fire pit nearby to make the space more inviting.
For those who love gardening, a pergola is an ideal support for wisteria, climbing roses, or grapevines. Just remember that these plants add weight and moisture, so choose a sturdy material and provide proper drainage. With the right accessories, your pergola becomes the heart of your outdoor living experience.
Common Mistakes to Avoid
Even experienced DIYers can make errors during a pergola installation. One of the most frequent mistakes is skipping the permit and cutting corners on footings, which leads to instability. Another is using improper hardware, which can corrode or fail under load. Also, many homeowners underestimate the importance of post anchoring, especially in areas with high winds. They also ignore local frost depths, causing the structure to heave during winter.
To avoid these pitfalls, always follow the manufacturer's instructions if you are using a kit, and consult engineering tables for beam sizes and spans. If you are unsure about any step, hire a professional to at least review your plan or handle the structural connections. A small investment in expertise can prevent a large headache later.
Getting Started with Your Project
Pergola installation is a rewarding project that adds beauty and function to your home. By planning carefully, choosing the right materials, and understanding the process, you can enjoy your outdoor space for years to come. Whether you decide to build it yourself or hire a contractor, take the time to research and prepare.
If you are ready to move forward, consider reaching out to USremodel to get free, customized quotes from qualified contractors in your area. They can help you compare options and find a professional who fits your needs and budget. A well-executed pergola installation not only enhances your daily life but also boosts your home's appeal and value.
Learn more about Patio Cover and Awning Services for guides, costs, and what to expect.
Compare Patio Cover and Awning Services Pros Near You
Enter your ZIP code to compare top-rated local professionals and request free quotes.