
Fall Home Maintenance Checklist: Gutters, Roof, and Heating
Get your home winter-ready with a fall home maintenance checklist covering gutters, roof, and heating. Call (833)-700-4293 for expert contractor quotes.

By Alexia Mabel
Learn more about Gutter Cleaning and Maintenance for guides, costs, and what to expect.
Compare Gutter Cleaning and Maintenance Pros Near You

Enter your ZIP code to compare top-rated local professionals and request free quotes.
As the days shorten and the air turns crisp, your home quietly signals that it is time to prepare for winter. The first hard freeze can arrive faster than most homeowners expect, and the damage it leaves behind, from ice dams to burst pipes to a furnace that quits on the coldest night, is both costly and preventable. A disciplined fall home maintenance checklist that focuses on gutters, roof, and heating is the single most effective way to protect your largest investment. This guide walks you through the essential tasks in each area, explains why they matter, and shows you when to call a professional. For homeowners who want to skip the guesswork and get matched with vetted local contractors, professional interior painting services and other seasonal upgrades can be scheduled through the same trusted platform.
Why a Fall Maintenance Checklist Saves You Money
Water is the most destructive force in any home, and winter gives it every opportunity to find a way inside. Clogged gutters send rainwater and melting snow spilling down your foundation, while a cracked flashing detail lets meltwater seep behind siding and into attic insulation. A heating system that has not been serviced may run at reduced efficiency all season, driving up utility bills by 10 to 30 percent, or fail entirely when you need it most. Each of these problems starts small and compounds quickly.
The financial case for a fall checklist is straightforward. Cleaning gutters yourself costs nothing but an afternoon, yet repairing foundation damage caused by poor drainage can run into the thousands. A professional furnace tune-up is a modest expense compared with replacing a heat exchanger or paying for emergency repairs during a cold snap. Insurers also take notice: many policies require homeowners to take reasonable steps to prevent freeze-related damage, and documented maintenance can support a claim if something goes wrong.
Timing matters as much as the tasks themselves. Aim to complete your fall checklist before the first hard freeze in your region, which typically means late October through mid-November in most of the United States. In colder climates, start earlier. Once temperatures drop below freezing, tasks like exterior caulking and water shutoff become difficult or unsafe to perform.
Use the following framework to organize your efforts over a weekend or two:
- Week one: Clear gutters and downspouts, inspect the roof and flashing, and seal exterior gaps.
- Week two: Schedule heating system service, test safety devices, and winterize outdoor plumbing.
- Throughout: Document what you find with photos and notes, especially any damage that may need professional attention.
With that structure in mind, let us dig into the three pillars of the fall home maintenance checklist: gutters, roof, and heating.
Gutter and Downspout Cleaning Before the First Freeze
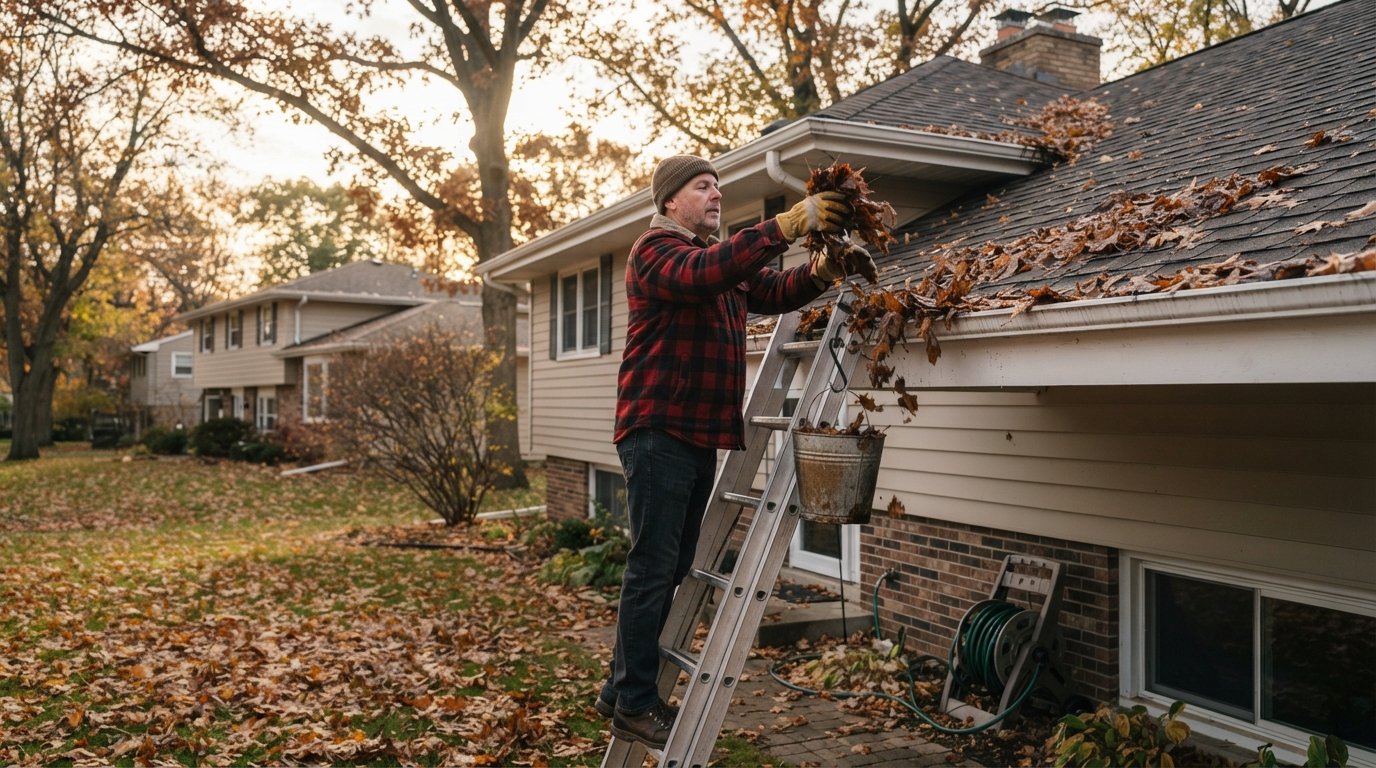
Gutters are the unsung heroes of your home's exterior. They channel thousands of gallons of water away from the roof, siding, and foundation each year. When they clog with leaves, twigs, and shingle grit, that water has nowhere to go but over the edge, where it pools against the foundation, erodes landscaping, and can eventually find its way into a basement or crawl space. In winter, standing water in gutters freezes, expands, and can pull the entire gutter system away from the fascia.
Cleaning gutters is a job many homeowners handle themselves, but it comes with real risks: ladder falls send thousands of people to emergency rooms every year. If your home has multiple stories, steep roof pitches, or you are simply not comfortable on a ladder, hiring a professional is the safer and often more economical choice in the long run. A pro will not only clear the debris but also check hangers, seams, and downspout connections while they are up there.
If you do tackle the job yourself, follow these steps for a thorough result:
- Put on gloves and safety glasses, and set your ladder on firm, level ground with a spotter nearby.
- Remove debris from the gutters by hand or with a scoop, working from the downspout end toward the far end.
- Flush the gutters and downspouts with a garden hose to confirm water flows freely and exits away from the foundation.
- Check that downspouts discharge at least four to six feet from the house, and add extensions if needed.
- Look for sagging sections, loose hangers, rust, or separated seams, and note any repairs for a professional.
After cleaning, consider whether gutter guards make sense for your property. Guards reduce the frequency of cleaning, but they do not eliminate it entirely, and some designs can trap fine debris that turns into a sludge layer over time. In regions with heavy pine needle or seed pod fall, guards can be a genuine labor saver; in others, regular cleaning remains the simplest approach. Either way, the goal before the first freeze is a clear, free-flowing system that moves water efficiently away from your home.
Downspout care deserves special attention. Underground drainage lines, common in many newer homes, can be crushed or clogged by roots and sediment. If your downspouts connect to a buried line, test the flow during dry weather and watch for backups. A blocked underground line can silently saturate the soil near your foundation, creating the exact problem the system was designed to prevent.
Roof and Flashing Inspection Priorities
Your roof takes the brunt of winter weather, and small defects that seem harmless in October can become major leaks by January. The goal of a fall roof inspection is to catch problems while they are still minor and to ensure the roof is ready for snow, ice, and freeze-thaw cycles. You do not need to climb onto the roof to do a meaningful inspection; in fact, most professionals recommend staying on the ground and using binoculars for the initial look.
From the ground, scan the roof for missing, cracked, or curling shingles, particularly on south-facing slopes where sun exposure is most intense. Look for dark streaks that suggest algae growth, granules collecting in gutters (a sign of shingle wear), and any sagging areas that could indicate decking problems. Check the flashing around chimneys, skylights, vents, and where roof planes meet walls. Flashing is the most common source of roof leaks, and its seals can dry out and crack over time.
Inside the attic, look for daylight coming through the roof boards, water stains on rafters or insulation, and any signs of moisture or mold. Proper attic ventilation and insulation are closely tied to roof health: warm air escaping into the attic can melt snow on the roof, which then refreezes at the eaves and forms ice dams. Ice dams force water under shingles and into the house, and they are far easier to prevent than to fix.
Prioritize these inspection points when assessing your roof this fall:
- Shingles: Check for missing, lifted, or damaged shingles and any exposed nails.
- Flashing: Inspect seals around the chimney, skylights, vents, and wall intersections.
- Valleys: Ensure roof valleys are clear of debris and that water can flow freely.
- Attic ventilation: Confirm soffit and ridge vents are open and insulation is not blocking airflow.
- Gutters and drip edge: Verify that the drip edge is intact and gutters are securely attached.
If you find damaged shingles, deteriorated flashing, or signs of water intrusion, schedule a professional roof inspection promptly. Roofers are busiest in the fall, so booking early improves your chances of getting repairs completed before winter. A reputable contractor can also advise on whether a repair is sufficient or whether replacement is the wiser investment, and they can document the roof's condition for insurance purposes.
Do not forget the small details. Seal any gaps around roof penetrations, replace cracked vent boots, and trim tree branches that overhang the roof. Branches that scrape shingles in the wind wear away the protective granules, and a heavy snow or ice load can snap limbs onto the roof. Keeping the roof clear of debris and overhanging limbs reduces the risk of both leaks and structural damage.
Furnace and Heating System Startup Checks
There is never a convenient time for a furnace to fail, but the worst time is during a January cold snap when every HVAC technician in town is booked solid. Fall is the right season to service your heating system, both to catch problems before they become emergencies and to maximize efficiency during the months when heating bills climb. A well-maintained furnace uses less fuel, runs more quietly, and lasts longer than one that is ignored.
Start with the basics you can handle yourself. Replace the air filter, which is the single easiest way to improve airflow and efficiency; a dirty filter forces the blower to work harder and can cause the system to overheat. Clear the area around the furnace and keep flammable materials at a safe distance. Test your smoke and carbon monoxide detectors and replace their batteries. If you have a gas furnace, check that the flame is blue and steady rather than yellow or flickering, and listen for unusual noises like rumbling, squealing, or banging.
Then bring in a professional for a full heating tune-up. A technician will clean the burners and blower, inspect the heat exchanger for cracks, test the safety controls, check the flue and venting, and measure the system's efficiency. This service typically includes:
- Inspecting and cleaning the burners, blower, and ignition system.
- Checking the heat exchanger for cracks or corrosion that could leak carbon monoxide.
- Testing safety switches, limit controls, and the flame sensor.
- Verifying proper venting and checking for gas leaks.
- Measuring airflow and temperature rise to confirm the system is operating within specifications.
If your home has a boiler or a heat pump, the service checklist differs, but the principle is the same: a professional inspection in the fall catches worn parts and refrigerant or water flow issues before they leave you without heat. Heat pumps in particular benefit from a fall check because they switch between heating and cooling modes and their reversing valves and defrost controls need to be functioning correctly for winter.
Beyond the equipment itself, take a few minutes to prepare your home for efficient heating. Seal drafts around windows and doors with weatherstripping or caulk, add insulation where it is missing, and consider a programmable or smart thermostat that lowers the temperature when you are away or asleep. These small upgrades reduce the load on your heating system and can pay for themselves within a season or two. If you are considering a larger energy upgrade, such as solar to offset rising electricity costs, free solar power quotes can show you what is available in your area without any obligation.
Outdoor Water Shutoff and Exterior Sealing Tasks
Freezing temperatures are unforgiving to plumbing that is exposed to the elements. An outdoor hose bib that still has water in it when the first freeze hits can split its pipe, and the resulting leak may not be discovered until spring, by which time water has been running inside the wall for months. Winterizing outdoor plumbing is a quick task that prevents one of the most common and expensive cold-weather disasters.
Begin by disconnecting garden hoses and draining them before storing them indoors. Shut off the valve that supplies outdoor faucets, then open the outdoor spigots to let any remaining water drain out. If your home has a sprinkler system, blow it out with compressed air according to the manufacturer's instructions or hire a professional to winterize it. For homes with a crawl space, insulate exposed pipes and seal foundation vents for the winter, following local guidance to avoid trapping moisture.
Exterior sealing is the other half of the cold-weather envelope. Walk the perimeter of your home and inspect for gaps and cracks around windows, doors, utility penetrations, and where different materials meet. Caulk or seal any openings you find, and replace worn weatherstripping on doors and windows. Check the siding for loose or damaged pieces, and seal around outdoor outlets and light fixtures. These steps keep cold air out, reduce heating costs, and, just as importantly, keep water and pests from finding their way in.
Do not overlook the following exterior tasks as part of your fall checklist:
- Clean and store outdoor furniture, grills, and lawn equipment.
- Drain and store hoses, and shut off exterior water supply valves.
- Seal cracks in the driveway, walkways, and foundation walls.
- Trim back vegetation from the siding and roofline.
- Check the chimney and fireplace, and schedule a sweep if you burn wood.
Finally, take stock of your emergency supplies. A fall checklist is also a preparedness exercise: confirm you have working flashlights, a battery-powered radio, and a plan for staying warm if the power goes out. If your heating system is aging and repairs are becoming frequent, fall is the ideal time to research replacement options and get quotes, rather than waiting for a breakdown in the middle of winter.
A thorough fall home maintenance checklist covering gutters, roof, and heating protects your home from the most common and costly winter problems. Clear gutters move water away from the foundation, a sound roof and flashing keep meltwater out, and a serviced heating system keeps your family warm and your energy bills predictable. Add outdoor water shutoff and exterior sealing, and you have addressed the major vulnerabilities before the first freeze arrives. If any task is beyond your comfort level, or if you want the work done quickly and correctly, connecting with a vetted local contractor through USremodel is a smart way to check everything off your list with confidence.