
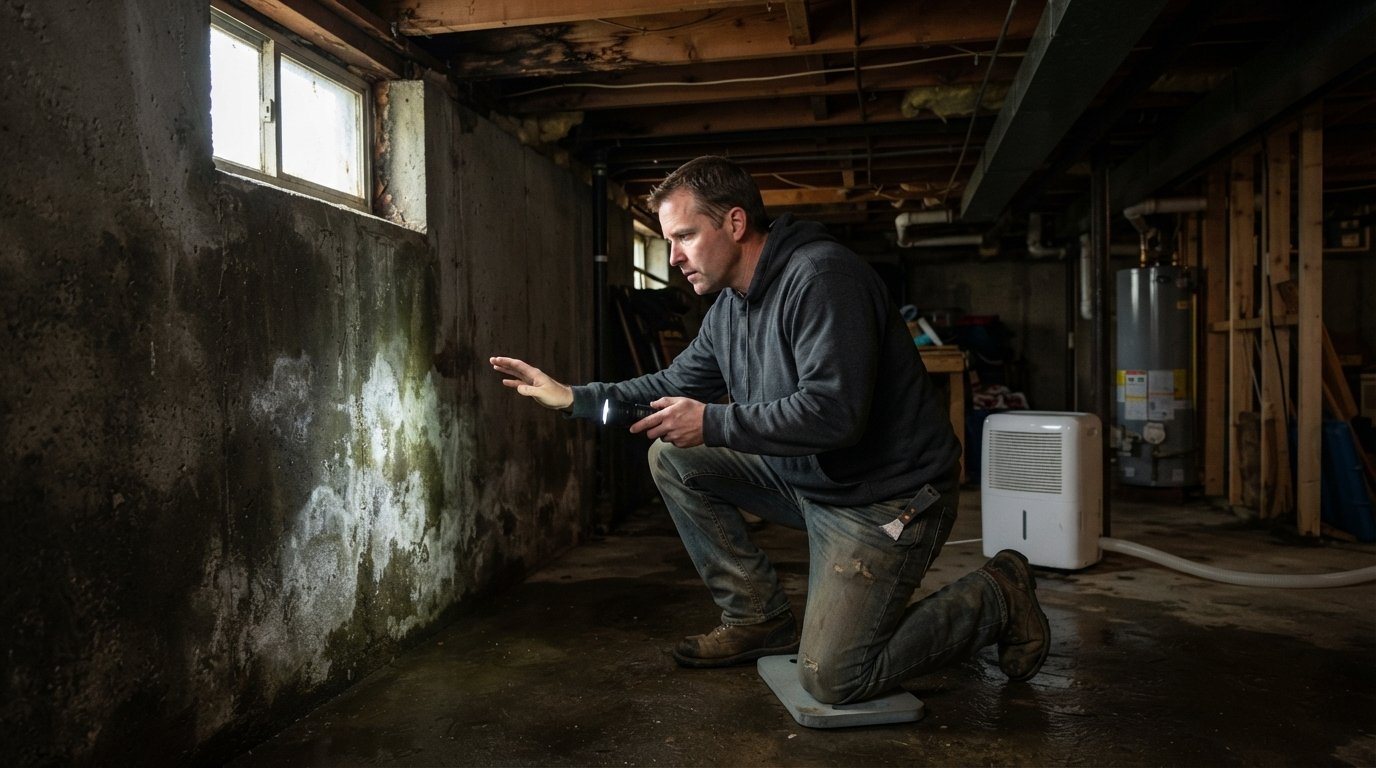
Basement and Crawl Space Moisture Signs and Waterproofing Options
Spot basement and crawl space moisture signs early and compare waterproofing options that protect your foundation. Call (833)-700-4293 for trusted local quotes.

By Chelsea Kris
Learn more about Home Waterproofing for guides, costs, and what to expect.
Compare Home Waterproofing Pros Near You

Enter your ZIP code to compare top-rated local professionals and request free quotes.
That faint musty smell in the hallway. The white chalky stains creeping up the concrete wall. The soft spot in the floorboard near the furnace. These are not random annoyances. They are early warnings that moisture is quietly working its way into your basement or crawl space, and the damage rarely stays contained. Wood framing rots, insulation loses its R-value, mold colonies spread, and indoor air quality drops for everyone living above. The good news is that moisture problems follow predictable patterns, and the waterproofing options available today are more effective and more affordable than many homeowners expect. This guide walks you through the signs worth taking seriously, the underlying causes most people miss, and the professional solutions that actually keep a foundation dry for the long haul.
Reading the Signs: What Basement and Crawl Space Moisture Looks Like
Moisture intrusion rarely announces itself with a flood. More often it shows up as subtle clues that build over months or years. Homeowners who learn to recognize these signals early can avoid the kind of structural repairs that run into five figures. The most common basement and crawl space moisture signs fall into a few categories: visual stains, odors, structural changes, and biological growth.
Efflorescence is one of the clearest indicators. Those white, powdery deposits on concrete or masonry walls are mineral salts left behind when water moves through the foundation and evaporates on the interior surface. Efflorescence itself is harmless, but it is proof that water is traveling through the wall. If you wipe it away and it returns, the source has not been addressed. Pair that with a musty odor, which comes from mold and mildew feeding on damp organic materials, and you have a strong case for a professional inspection.
Other signs deserve equal attention. Standing water or damp patches on the floor after rain point to hydrostatic pressure or failed drainage. Wood rot in sill plates, floor joists, or subfloor panels suggests long-term exposure. Rust on metal appliances, water heaters, or storage racks indicates elevated humidity. Condensation on pipes and windows in summer is another clue. And in crawl spaces, sagging insulation, cupped hardwood floors above, and visible mold on joists all signal that moisture is being trapped rather than vented.
Here is a quick checklist of the most reliable warning signs to watch for:
- White chalky stains (efflorescence) on concrete or block walls
- Persistent musty or earthy odors that do not clear with ventilation
- Standing water, damp spots, or water stains on the floor
- Rust on appliances, pipes, or stored metal items
- Soft, crumbling, or discolored wood at the base of walls or joists
- Visible mold or mildew growth on surfaces
- Condensation on pipes, ducts, or window glass
Any single sign is worth investigating. Two or more together almost always mean an active moisture pathway that needs professional attention. The earlier you act, the more likely the fix is a moderate waterproofing project rather than a structural repair.
Why Foundation Cracks and Gutter Overflow Drive Most Moisture Problems
Homeowners often assume moisture comes from groundwater alone, but the reality is more mundane. Most wet basements and crawl spaces trace back to two ordinary culprits: water pooling against the foundation and water failing to leave the roof properly. Understanding these pathways makes the waterproofing options easier to evaluate.
Foundation cracks are the classic entry point. Hairline cracks in poured concrete walls are common as the material cures and settles, and while they may look minor, they create a direct channel for water under pressure. Block foundations are even more vulnerable because the mortar joints between blocks act as a network of seams. Once soil outside the wall becomes saturated, hydrostatic pressure pushes water through those cracks and joints. The same pressure can force water up through the cove joint where the floor meets the wall, which is why many basements stay damp even when no visible crack exists.
Gutter overflow is the quieter offender. When gutters clog, sag, or discharge too close to the house, roof runoff dumps thousands of gallons of water directly against the foundation during a single storm. That saturated soil creates the exact pressure conditions that force water indoors. Downspouts that end within a few feet of the wall compound the problem. In many cases, correcting grading and extending downspouts reduces basement dampness dramatically before any interior system is even considered.
Soil conditions matter as well. Clay-heavy soils drain slowly and hold water against the foundation. Homes on a slope may receive surface water from uphill neighbors. And older homes often lack the exterior drainage tile and waterproof membrane that modern construction includes. A thorough inspection looks at all of these factors, not just the interior symptoms.
Interior Drainage, Sump Pumps, Encapsulation, and Exterior Grading Compared
Once the cause is understood, the conversation turns to solutions. The main waterproofing options fall into interior drainage systems, sump pumps, crawl space encapsulation, and exterior approaches such as grading, drainage tile, and membrane installation. Each has a role, and the best plan often combines more than one. The key is matching the method to the actual water pathway rather than applying a one-size-fits-all fix.
Interior drainage systems capture water where it enters and route it to a sump pump. A perimeter channel is installed along the cove joint, often beneath a new concrete floor edge, and water flows by gravity to a sump pit. A primary pump discharges it outdoors, and a battery backup keeps the system running during power outages, which is exactly when storms are most likely to knock out electricity. Interior systems are effective for hydrostatic pressure and rising groundwater, they can be installed year-round regardless of weather, and they do not disturb landscaping. The tradeoff is that they manage water after it has entered the foundation rather than stopping it outside.
Crawl space encapsulation takes a different approach. Instead of ventilating a crawl space, which actually draws humid outdoor air in, encapsulation seals the space with a heavy-duty vapor barrier on the floor and walls, seals vents, and typically adds a dehumidifier. This turns a damp, unconditioned zone into a dry, semi-conditioned one. The benefits go beyond moisture control: encapsulation reduces mold risk, protects wood framing, improves energy efficiency, and can make the space usable for storage. It is one of the highest-value moisture solutions for homes with vented crawl spaces.
Exterior waterproofing is the most thorough approach when the foundation is already exposed or when excavation is practical. It involves applying a waterproof membrane to the exterior wall, installing drainage board, and ensuring footer tile directs water away. This stops water before it reaches the wall. However, it requires excavation, which makes it more expensive and disruptive, and it is not always feasible on tight lots or finished landscapes. Exterior grading is a simpler cousin: regrading soil to slope away from the house, extending downspouts, and repairing gutter systems. These low-cost steps should always come first when site conditions allow.
The comparison comes down to a simple framework:
- Interior drainage plus sump pump: best for hydrostatic pressure, rising water tables, and year-round installation
- Crawl space encapsulation: best for vented crawl spaces with high humidity, mold, and energy loss
- Exterior membrane and drainage tile: best when excavation is practical and the goal is to stop water at the source
- Grading and gutter corrections: always recommended first because they are inexpensive and address common causes
Many professional waterproofing plans combine two or three of these. For example, a homeowner might extend downspouts, regrade a low spot, install an interior perimeter drain with a backup-equipped sump pump, and encapsulate the crawl space. That layered approach addresses both the water reaching the foundation and the humidity already trapped inside.
If your plans extend beyond waterproofing and you are considering turning the space into living area, our guide on luxury basement finishing explains how to sequence moisture control before framing and finishes go in. Waterproofing first is non-negotiable; finishing a basement before solving moisture is one of the most expensive mistakes a homeowner can make.
Cost and Durability Differences Between Interior and Exterior Approaches
Cost is usually the deciding factor for homeowners, but the sticker price alone can be misleading. Interior systems typically cost less upfront because they avoid excavation. A perimeter drain and sump pump installation commonly falls in a moderate range, while crawl space encapsulation varies with the size of the space and the dehumidifier selected. Exterior waterproofing costs more because it involves digging, disposing of soil, and restoring landscaping, but it addresses the problem at the source and can last for decades when properly installed.
Durability depends heavily on installation quality. A sump pump has a service life of roughly seven to ten years, so a battery backup and a maintenance routine matter. Interior drainage channels can last the life of the home if they are properly sloped and kept clear. Encapsulation liners are durable but depend on correct sealing and a functioning dehumidifier. Exterior membranes are long-lived but only as good as the drainage tile and backfill around them.
Rather than comparing raw prices, compare the full scope. A cheap interior quote that omits a backup pump, discharge line, and vapor barrier may cost more over time than a complete system. Likewise, an exterior quote that does not include footer tile inspection or proper grading may leave the original problem partly unsolved. The most durable solution is the one that matches the water source and is installed with the full scope specified in writing.
Getting Waterproofing Quotes That Specify the Full Scope
Waterproofing is one of those projects where the details in the proposal matter as much as the price. A vague quote leaves room for change orders and shortcuts. Before you sign anything, ask each contractor to walk the space with you, explain the water pathway they have identified, and put the complete scope in writing. That conversation separates professionals who diagnose from those who simply sell a product.
Use a structured comparison when reviewing bids. The following steps help you evaluate proposals on equal footing:
- Request an on-site inspection and a written diagnosis of the moisture source, not just a product recommendation.
- Confirm whether the quote covers the full system: drainage channel, sump pit, primary and backup pumps, discharge line, vapor barrier, and any needed grading or gutter work.
- Ask about permits, warranties, and what happens if the system does not keep the space dry.
- Compare at least three quotes with itemized line items so you can see what is included and what is not.
- Verify licensing and insurance, and ask for references from similar homes in your area.
A complete proposal should also address the exterior where relevant. If downspouts discharge at the foundation or the soil slopes toward the house, no interior system will perform at its best. The best contractors point this out and include corrections in the scope. When comparing contractors, resources like ContractorHomeQuotes can help homeowners understand typical pricing and vet bids before committing. For homeowners who want multiple vetted professionals to assess the same problem, USremodel's free quote request connects you with independent local contractors who can inspect the space and propose a scope tailored to your home.
Pay attention to warranty language. A lifetime warranty on a sump pump is meaningless if it excludes labor or requires a maintenance contract you were not told about. Ask what the warranty covers, how long it lasts, and whether it transfers if you sell the home. Clear answers are a sign of a contractor who stands behind the work.
Preventing Moisture Problems Before They Start
Waterproofing is not a one-time event; it is a maintenance mindset. Once a system is in place, a few simple habits protect the investment. Clean gutters at least twice a year, and more often if your roof is surrounded by trees. Check that downspouts discharge several feet from the foundation and that the ground slopes away from the house. Keep the sump pump discharge line clear and test the pump before storm season. In encapsulated crawl spaces, confirm the dehumidifier is draining properly and the liner stays sealed.
Indoors, avoid storing cardboard, paper, or fabric directly against basement walls, since these materials hold moisture and feed mold. Run a dehumidifier in damp months if humidity climbs above 50 percent. Watch for new efflorescence or musty odors after heavy rain, and address small cracks before they widen. These low-cost steps extend the life of any waterproofing system and catch new issues while they are still minor.
If you are planning a larger renovation, coordinate moisture work with the rest of the project schedule. Waterproofing, drainage, and encapsulation should be completed and verified dry before insulation, drywall, or flooring goes in. That sequencing protects both the new finishes and your budget. A dry foundation is the foundation of every other improvement, and addressing it first is the surest way to protect the value of your home.