
Whole House Water Filtration System Installation Guide
This whole house water filtration system installation guide covers planning, costs, and pro tips for clean water at every tap. Call 8337004293 for help.
By Danica Leslie
Learn more about Water Treatment System Installation or Replacement for guides, costs, and what to expect.
Compare Water Treatment System Installation or Replacement Pros Near You

Enter your ZIP code to compare top-rated local professionals and request free quotes.
Clean, safe water flowing from every tap in your home is not a luxury, it is a reasonable expectation. Yet many homeowners discover that their municipal supply or private well delivers water laced with chlorine, sediment, heavy metals, or hard minerals that damage pipes and appliances. A whole house water filtration system installation guide helps you move from frustration to action. This article walks you through the essential planning, equipment selection, and professional installation steps so you can enjoy purified water at every faucet, shower, and appliance connection. Whether you are upgrading an older home or building new, understanding this process will save you money and prevent costly mistakes.
Why Whole House Filtration Matters for Your Home
Point-of-use filters handle a single tap, but a whole house system treats every drop entering your plumbing. That distinction matters because water quality affects more than drinking. Sediment and chlorine wear down water heaters, washing machines, and dishwashers. Hard water leaves scale inside pipes, reducing flow and increasing energy bills. Chlorine and its byproducts dry out skin and hair, and some contaminants carry long-term health concerns. A whole house water filtration system installation guide exists because treating water at the point of entry is the most efficient way to protect both your family and your investment.
Homeowners often ask whether municipal water is already safe. It usually meets minimum standards, but those standards address acute risks, not aesthetics or long-term appliance protection. Private wells face even less oversight. Testing your water is the first step. A basic lab test reveals hardness, pH, chlorine, iron, manganese, lead, and bacterial presence. Those results determine which filtration stages you actually need. Skipping this step is like buying shoes without knowing your size.
Once you know your water profile, you can match a system to your goals. Some homeowners want only sediment and carbon filtration. Others need a water softener combined with carbon and possibly reverse osmosis for drinking water. The installation process varies slightly depending on complexity, but the core principles remain the same. Planning prevents expensive rework and ensures you buy equipment that lasts. If you are also considering broader home upgrades, such as security improvements, you might review resources like Why Home Security System Installation Benefits Your Family to see how integrated systems add value. For water filtration, the value is immediate: better taste, lower appliance repair bills, and peace of mind.
Types of Whole House Systems and What They Remove
Not all filtration systems are built the same. Before you buy, understand the main categories. Each has strengths and trade-offs. Your water test results and budget will guide the final choice.
- Sediment filters: Trap sand, rust, and dirt. They protect downstream components and are often the first stage.
- Carbon filters: Remove chlorine, chloramine, volatile organic compounds, and many odors. They improve taste and reduce skin irritation.
- Water softeners: Use ion exchange to remove calcium and magnesium, eliminating scale. They require salt or potassium refills.
- Reverse osmosis (RO): Typically installed at a single tap but can be whole house with a storage tank and pump. Removes most dissolved solids, including lead and arsenic.
- UV purifiers: Use ultraviolet light to neutralize bacteria and viruses. Essential for well water or surface water sources.
Many homes benefit from a multi-stage approach. A common setup includes sediment and carbon filtration followed by a softener, with a separate RO system under the kitchen sink for drinking and cooking. Whole house RO is possible but wastes more water and requires more maintenance. Discuss your priorities with a water treatment professional. They can test your water and recommend a configuration that balances performance, cost, and upkeep.
If you are remodeling other parts of your home, you might also consider how water quality interacts with your plumbing fixtures. Hard water shortens the life of faucets, showerheads, and valves. Installing filtration during a renovation is far easier than retrofitting later. That is why many homeowners combine water treatment upgrades with bathroom or kitchen remodels. For broader renovation needs, platforms like 180Remodel connect you with contractors who handle multiple trades, ensuring your plumbing and filtration work is coordinated with other improvements.
Pre-Installation Planning and Site Assessment
Proper planning separates a smooth installation from a stressful one. Start by locating the main water shut-off valve and the point where the water line enters your home. The filtration system must be installed after the meter (for municipal water) or after the pressure tank (for well water) but before any branching lines. This ensures all water is treated. You also need a dedicated power outlet nearby if the system uses electricity, such as UV lamps or control valves. A floor drain or sump pit is helpful for backwashing and maintenance.
Measure the available space. Whole house systems vary in size. A basic sediment and carbon filter might take up two feet of vertical space. A softener adds a brine tank, which needs a few square feet of floor area. Check clearances for filter changes and repairs. If you live in a cold climate, protect the system from freezing. Insulate pipes or install the unit in a heated space.
Water pressure and flow rate are critical. Most homes need 8 to 15 gallons per minute (GPM) to run multiple fixtures simultaneously. A system that restricts flow will cause weak showers and slow filling of washing machines. Check the pressure drop specification for any system you consider. If your home has high pressure (above 80 psi), install a pressure-reducing valve before the filtration system. High pressure can damage filters and plumbing.
Finally, check local plumbing codes. Some municipalities require a permit for water treatment installation. Others require a backflow preventer or specific materials. A licensed plumber will know the rules. Skipping permits can create problems when you sell your home or if a leak causes damage. If you need help finding a qualified professional, USremodel offers a free quote service that matches you with licensed contractors in your area. You can submit your project details and receive multiple bids, which saves time and ensures competitive pricing.
Step-by-Step Installation Guide
While some confident DIYers tackle water filtration installation, most homeowners hire a professional. The steps below outline the process so you understand what to expect and can communicate effectively with your contractor. If you choose to hire, ensure the plumber has experience with water treatment systems, not just general plumbing.
- Shut off the main water supply and drain lines. Open the lowest faucet in the house to relieve pressure.
- Mark the installation location. Ensure it is level, accessible, and protected from freezing. Install a mounting bracket if needed.
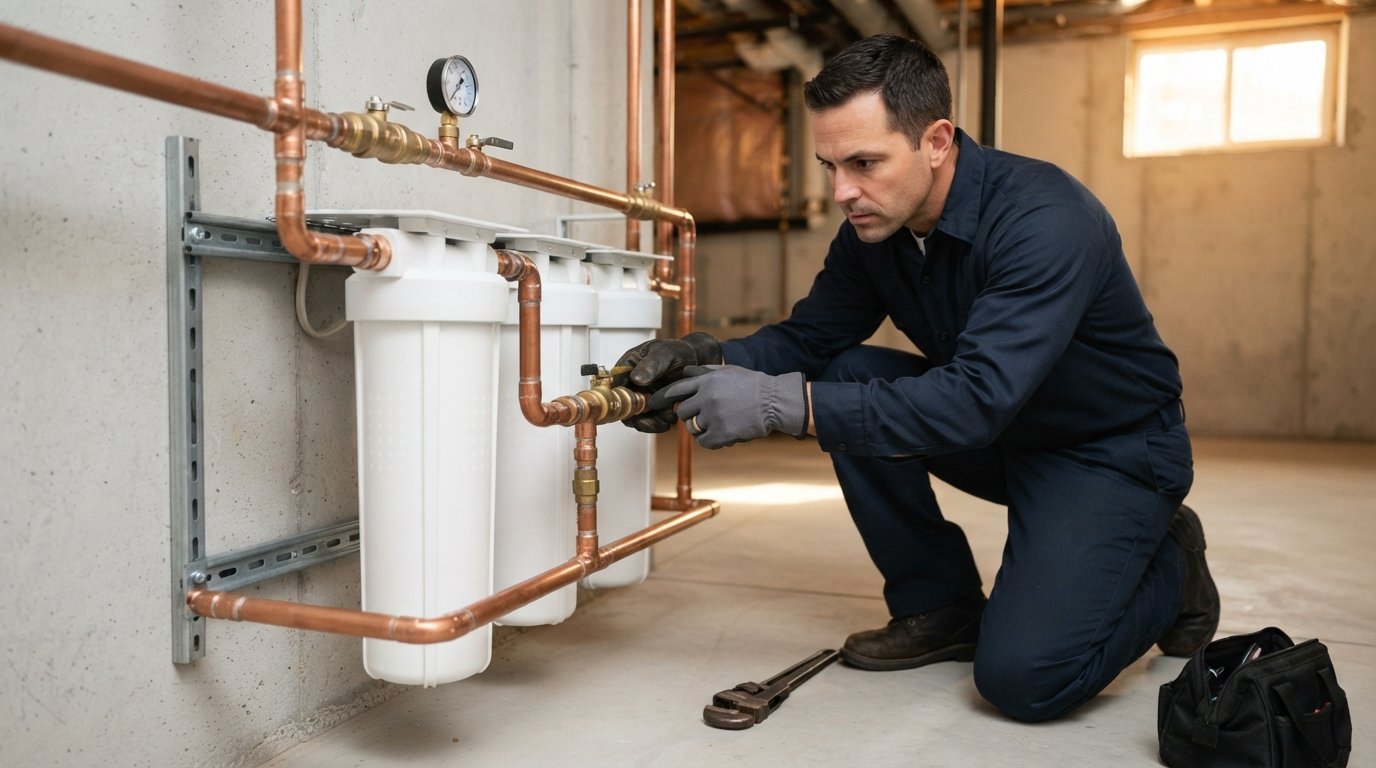
- Cut into the main water line. Use a pipe cutter for clean edges. Install tee fittings and a bypass valve so you can service the system without losing water.
- Connect the filtration system. Follow the manufacturer's diagram. Use appropriate fittings and thread sealant. Do not overtighten plastic connections.
- Install the drain line for backwashing or RO reject water. Route it to a floor drain, sump, or outside, following local codes.
- Connect electrical components. Plug in control valves, UV lamps, or pumps. Use a GFCI outlet for safety.
- Slowly open the main valve and check for leaks. Tighten connections as needed. Run water through the system to flush carbon fines and sanitize.
- Program the control valve and set regeneration schedules. Test water at a tap to confirm treatment is working.
After installation, label the bypass valve and note filter change dates. Keep the manual in a safe place. Most systems require sediment filter changes every 3 to 6 months, carbon every 6 to 12 months, and softener resin every 10 to 15 years. UV lamps need annual replacement. Budget for these consumables. They are part of the cost of clean water.
If you are uncomfortable with any step, stop and call a professional. Water damage from a poor connection can cost thousands. A licensed plumber will complete the job quickly and correctly. Many contractors also offer maintenance plans that include filter replacements and system checkups. That convenience is worth considering if you prefer not to track schedules yourself.
Costs, Permits, and Professional vs DIY
Budgeting for a whole house filtration system involves more than the equipment price. Installation labor, permits, and potential plumbing modifications add to the total. On average, homeowners spend between $1,500 and $5,000 for a professionally installed system, depending on complexity and water quality issues. A basic sediment and carbon filter might cost $800 to $1,500 installed. Adding a softener pushes the range to $2,500 to $4,000. Whole house RO or UV purification can exceed $5,000. These figures vary by region and contractor.
DIY installation can save labor costs, but it carries risks. If you are not comfortable cutting into the main water line, soldering copper, or working with electrical connections, hire a pro. Also consider warranty implications. Many manufacturers require professional installation to validate the warranty. A failed DIY job could void coverage and lead to expensive repairs. Permits are another factor. Some jurisdictions require a plumbing permit for water treatment installation. The permit fee is usually modest, but skipping it can result in fines or forced removal.
Financing options exist. Some contractors offer payment plans. USremodel can connect you with multiple contractors who provide free quotes, allowing you to compare prices and financing terms. That competition helps you get the best value. Remember that the cheapest bid is not always the best. Look for licensed, insured professionals with experience in water treatment. Ask for references and check online reviews. A good contractor will explain the system, answer questions, and provide a written estimate that details parts and labor.
Maintenance Tips for Long-Term Performance
Once your system is installed, a little maintenance goes a long way. Sediment filters are the first line of defense. Replace them when you notice a pressure drop or discoloration. Carbon filters lose effectiveness over time, even if water still flows. Mark your calendar for replacements. Softeners need salt refills every 4 to 8 weeks, depending on water hardness and usage. Clean the brine tank annually to prevent buildup. UV lamps should be replaced every 12 months, even if they still glow, because the intensity diminishes.
Test your water annually. Water quality can change due to seasonal shifts, municipal treatment adjustments, or well conditions. A simple test kit or lab analysis confirms your system is still performing. If you notice changes in taste, odor, or pressure, investigate immediately. Sometimes a simple filter change solves the problem. Other times, you may need to adjust the system or add a stage.
Winterize if your system is in an unheated space. Frozen pipes and filter housings can crack, causing leaks when temperatures rise. Insulate exposed pipes and consider a small space heater for extreme cold. If you leave home for extended periods, shut off the water and drain the system to prevent damage.
Keep records of all maintenance. This documentation helps if you sell your home. Buyers appreciate knowing the water is treated and the system is well maintained. It can be a selling point, especially in areas with known water issues.
Common Mistakes to Avoid
Many homeowners rush into buying a system without testing their water first. That leads to ineffective filtration or unnecessary stages. Always test before you buy. Another mistake is undersizing the system. A unit that cannot handle your home's peak flow rate will cause pressure problems. Check the GPM rating and compare it to your needs. If you have three bathrooms and a large family, you need a higher flow rate than a single person in a small condo.
Ignoring local codes is another pitfall. Some areas require a backflow preventer or specific drain connections. A professional installer will know these requirements. Skipping permits can cost you later. Also, do not neglect the bypass valve. Without one, you cannot service the system without shutting off all water to the house. That inconvenience leads to skipped maintenance.
Finally, do not assume all systems are equal. Research brands, read reviews, and ask about warranty terms. A cheap system may save money upfront but fail prematurely. Look for certifications such as NSF/ANSI standards, which verify performance claims. A reputable contractor will recommend products that meet these standards.
Clean water is a cornerstone of a healthy, efficient home. By following this whole house water filtration system installation guide, you can plan confidently, choose the right equipment, and work with a professional to get it installed correctly. Whether you are motivated by health, appliance protection, or simply better-tasting water, the investment pays off daily. If you are ready to take the next step, USremodel can connect you with local contractors who specialize in water treatment and plumbing. Submit your project details to receive free, customized quotes and compare options. Your home and your family will thank you.