Flooring Installation Guide for Homeowners
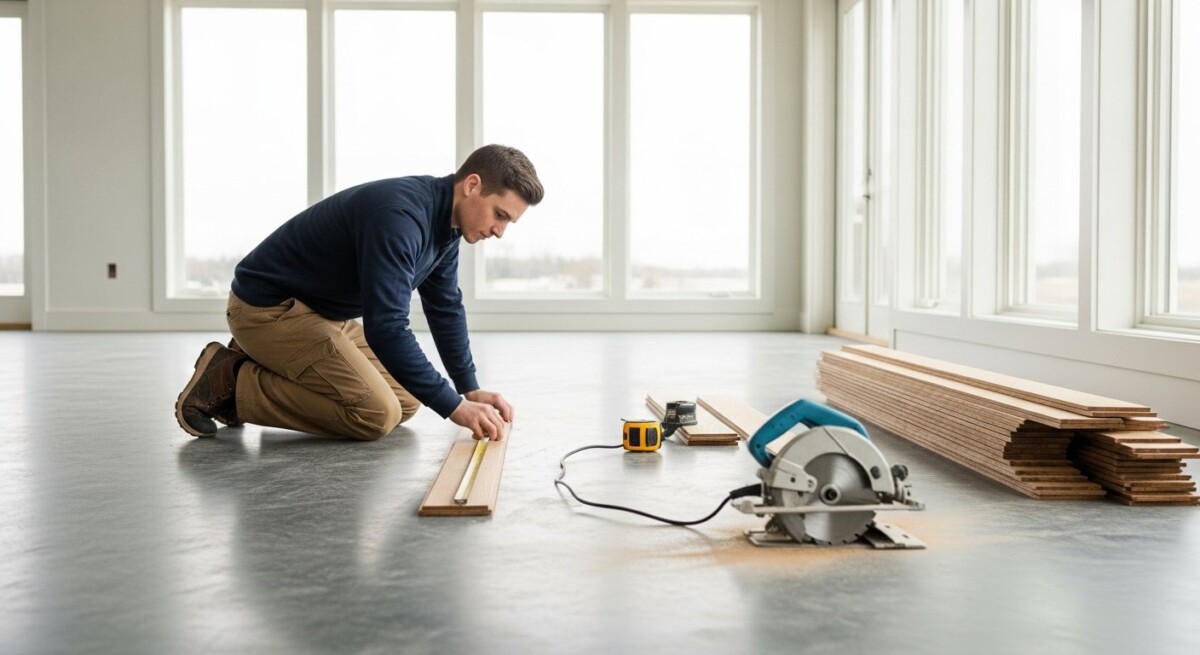
Standing in an empty room with bare subfloor can feel both exciting and overwhelming. The decision to replace your floors represents one of the most impactful home improvement projects you will ever undertake. A professional flooring installation transforms not just the look of a space but its comfort, durability, and market value. Whether you are renovating a single bedroom or an entire home, understanding the process, materials, and costs involved is essential to making informed choices.
Many homeowners assume that picking a floor covering is the hardest part. In reality, the installation phase determines how long your floors will last and how they will perform under daily use. Poor installation can ruin even the most expensive materials. That is why partnering with experienced contractors and knowing what to expect at each stage is critical. This guide walks you through everything from material selection to post-installation care, helping you avoid costly mistakes and achieve results you will love for years to come.
Choosing the Right Flooring Material for Your Home
Your choice of flooring material sets the foundation for the entire project. Each material offers distinct advantages in terms of appearance, durability, maintenance, and cost. The best option for your home depends on factors like room usage, moisture levels, traffic, and your personal style. Below is a breakdown of the most popular flooring types to help you compare.
- Hardwood: Timeless and elegant, hardwood floors add significant resale value. They are durable but require refinishing over time and are sensitive to moisture.
- Engineered Wood: A more stable alternative to solid hardwood, engineered wood has a real wood veneer over plywood layers. It resists humidity better and works well in basements or over concrete slabs.
- Luxury Vinyl Plank (LVP) and Luxury Vinyl Tile (LVT): Waterproof, scratch-resistant, and available in realistic wood and stone looks. Ideal for kitchens, bathrooms, and high-traffic areas.
- Laminate: Affordable and durable, laminate mimics hardwood with a photographic layer. It is easy to install but can be damaged by moisture.
- Ceramic and Porcelain Tile: Extremely hard, waterproof, and available in endless designs. Best for wet areas like bathrooms and entryways.
- Carpet: Soft, warm, and sound-absorbing. Suitable for bedrooms and cozy living spaces but requires regular cleaning and replacement sooner than hard surfaces.
Once you narrow down your material options, consider the installation method required. Some products click together as floating floors, others need glue or nail-down fastening. Your subfloor condition also plays a role. For example, concrete slabs may require a moisture barrier before installing hardwood or laminate. Consulting a professional early can help you avoid surprises.
For those leaning toward hardwood, we recommend reviewing our detailed guide on hardwood flooring installation techniques and best practices. This resource covers subfloor prep, acclimation, and finishing options specific to solid and engineered wood floors.
The Three Key Phases of Flooring Installation
Every successful flooring project follows a structured sequence: preparation, installation, and finishing. Skipping or rushing any of these phases leads to problems like uneven floors, squeaks, gaps, or premature wear. Below we examine each phase in detail.
Phase 1: Preparation and Subfloor Assessment
Before any new flooring goes down, the existing surface must be removed and the subfloor inspected. Contractors check for levelness, moisture content, and structural integrity. High spots need sanding, low spots require patching compound, and any rot or damage must be repaired. For concrete slabs, a moisture test is essential. If readings exceed the flooring manufacturer’s limits, a vapor barrier or sealant may be required.
Acclimation is another critical preparation step. Materials like hardwood and engineered wood need to adjust to the room’s temperature and humidity for 48 to 72 hours before installation. This prevents buckling or gap formation after installation. Your contractor will stack the planks in the room with spacers to promote airflow.
Finally, the work area should be cleared of furniture, baseboards removed, and door casings undercut to accommodate the new floor height. Proper planning at this stage saves time and frustration later.
Phase 2: Installation Methods by Material Type
The installation technique varies widely depending on the flooring product. Here is what to expect for common materials.
Floating Floors (Laminate, LVP, Engineered Click): Planks snap together via a tongue-and-groove or click-lock system. No glue or nails are used; the floor floats over an underlayment. This method is fast and DIY-friendly but requires precise spacing around walls to allow for expansion. Gaps are covered by baseboards or quarter round.
Glue-Down Floors (LVT, Sheet Vinyl, Some Engineered Wood): Adhesive is troweled onto the subfloor, and planks or tiles are pressed into place. This method provides a firm bond and works well in high-moisture areas. However, adhesive fumes require adequate ventilation, and removal is labor-intensive.
Nail-Down Floors (Solid Hardwood): Strips are nailed to a plywood subfloor using a flooring nailer. This is the traditional method for solid hardwood and offers superior stability. It requires a wooden subfloor and is best left to experienced professionals.
Thinset Installation (Tile): Ceramic and porcelain tiles are set into a layer of thinset mortar. Spacers ensure even grout lines. After the mortar cures, grout is applied and sealed. A backer board underlayment is usually needed to prevent cracking.
For waterproof rooms like kitchens and bathrooms, luxury vinyl is an excellent choice. Our comprehensive article on vinyl flooring installation for homeowners explains how to achieve a seamless, watertight finish.
Phase 3: Finishing Touches and Post-Installation Care
Once the floor is installed, the final details make the difference between a professional job and an amateur one. Baseboards or shoe molding are reinstalled or added to cover expansion gaps. Transition strips bridge different flooring types at doorways. For hardwood floors, finishing may involve sanding and applying stain or polyurethane if prefinished planks were not used.
After installation, avoid heavy traffic for at least 24 hours (longer for glue or thinset installations). Clean the floor according to the manufacturer’s instructions. Use felt pads under furniture legs, place mats at entrances, and promptly wipe up spills. Regular maintenance extends the life of your new floor significantly.
Cost Factors and Budget Planning
Flooring installation costs vary widely based on material, room size, subfloor condition, and labor rates in your area. On average, homeowners spend between $3 and $12 per square foot for materials plus $2 to $8 per square foot for professional installation. Here is a breakdown of key cost drivers.
- Material Quality: Premium hardwood or large-format tile costs more than basic laminate or carpet. But higher quality often means longer lifespan.
- Subfloor Repairs: Leveling compound, plywood patching, or moisture barriers add $1 to $3 per square foot.
- Removal and Disposal: Tearing out old flooring and hauling it away costs $1 to $2 per square foot.
- Custom Layouts: Diagonal patterns, herringbone, or inlays require extra labor and increase installation time.
- Accessories: Underlayment, trim, transition strips, and adhesives can add 10-20% to the total.
Getting multiple quotes from licensed contractors is the best way to ensure you pay a fair price. Look for estimates that itemize labor, materials, and any additional fees. Avoid surprisingly low bids that may indicate shortcuts or inferior materials.
If budget is tight, consider installing new flooring in high-impact areas first (like the living room or entry) and postponing less visible rooms. Some homeowners also choose to do demolition themselves to save money, but always confirm with your contractor that this will not void warranties.
Common Mistakes to Avoid During Flooring Installation
Even with careful planning, certain pitfalls can compromise your project. Familiarizing yourself with these common errors helps you ask the right questions and keep your contractor accountable.
Neglecting Acclimation: Installing wood or vinyl without allowing it to adjust to the room’s climate can lead to buckling or gaps within weeks. Always follow the manufacturer’s recommended acclimation period.
Ignoring Subfloor Moisture: A damp subfloor will cause mold, swelling, and adhesive failure. Test for moisture before any installation. In basements or slab-on-grade homes, a vapor barrier is non-negotiable.
Incorrect Expansion Gaps: All hard surface floors expand and contract with temperature changes. If planks are butted tight against walls or fixed objects, they will buckle. Leave at least a 1/4-inch gap around the perimeter and cover it with trim.
Skipping Underlayment: Underlayment provides cushioning, sound reduction, and moisture protection. Using the wrong type or omitting it altogether can void the floor warranty.
Hiring an Unqualified Installer: Flooring installation requires skill and experience. Check references, read reviews, and ensure the contractor is licensed and insured. A bad installation will cost more to fix than hiring a pro upfront.
For a complete overview of the process from start to finish, refer to our main resource on flooring installation: a complete guide for homeowners. This page covers everything from initial planning to final inspection.
How to Find a Reliable Flooring Contractor
Selecting the right professional is just as important as choosing the right floor. Start by asking for recommendations from friends or neighbors who recently had floors installed. Online platforms like usremodel.com connect homeowners with pre-screened contractors in their area. The benefit of using a lead generation service is that you receive multiple quotes quickly, allowing you to compare pricing and approach.
When vetting contractors, look for these qualities:
- Proof of general liability insurance and worker’s compensation coverage.
- A written contract detailing scope, materials, timeline, and payment schedule.
- At least three references from recent flooring installations similar to yours.
- A portfolio of completed projects you can view.
- Willingness to answer questions about subfloor prep, acclimation, and warranty.
Never pay the full amount upfront. A typical payment schedule is 30% down, 40% at the midpoint, and 30% upon final inspection. Trust your instincts: if a contractor pressures you or avoids answering questions, move on to the next candidate.
Maintaining Your New Floors for Long-Term Beauty
Once your flooring installation is complete, proper care preserves its appearance and extends its life. Different materials require different cleaning methods. Hardwood should be swept or vacuumed regularly and cleaned with a manufacturer-approved wood cleaner. Avoid wet mopping, which can damage the wood. Luxury vinyl and laminate can be damp-mopped with a mild cleaner but avoid abrasive pads. Tile and grout need periodic sealing to prevent staining, while carpet benefits from quarterly professional deep cleaning.
Place walk-off mats at exterior doors to trap dirt and grit before it reaches the floor. Use felt pads under furniture legs to prevent scratches. Trim pet nails regularly. In high-humidity climates, a dehumidifier helps hardwood and engineered floors stay stable. By following these simple routines, your floors will remain beautiful and functional for decades.
Ultimately, a successful flooring installation is a combination of smart material selection, meticulous preparation, skilled installation, and ongoing maintenance. By arming yourself with knowledge and partnering with trusted contractors, you can transform your home with confidence and enjoy the benefits of new flooring every single day.