
Smart Home Tech Worth Installing During a Renovation
Plan smart home technology worth installing during a renovation before the walls close. Call (833)-700-4293 to connect with vetted local pros.

By Justin Blake
Learn more about Smart Home Installation or Repair for guides, costs, and what to expect.
Compare Smart Home Installation or Repair Pros Near You

Enter your ZIP code to compare top-rated local professionals and request free quotes.
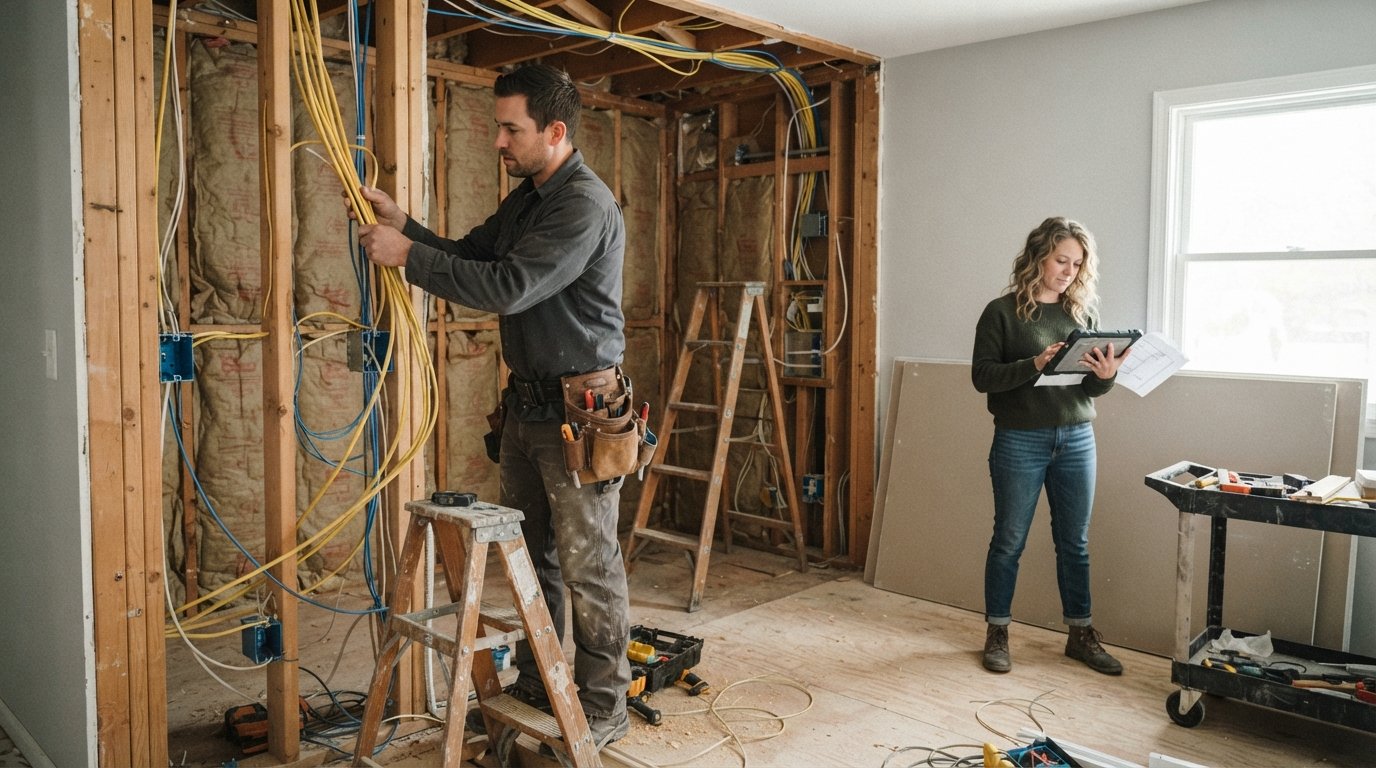
Every renovation is a brief window of opportunity. Once the drywall goes up, the outlets are cut in, and the trim is painted, adding smart home infrastructure becomes dramatically more expensive and disruptive. The homeowners who get the most value from automation are not the ones who buy the most gadgets; they are the ones who make a handful of strategic decisions while the walls are still open. This guide covers the smart home technology worth installing during a renovation, with a focus on pre-wiring choices, devices that age well, network reliability, and how to coordinate low-voltage work with your general contractor.
Why a Renovation Is the Best Time to Plan Smart Home Infrastructure
A renovation exposes the bones of your house: studs, joists, electrical runs, and HVAC chases. That access is the single biggest advantage you will ever have for running low-voltage cable, adding dedicated circuits, and creating space for future devices. Retrofitting the same infrastructure later often means cutting drywall, patching, repainting, and paying a premium for a small job that a contractor can complete in an hour during construction.
There is also a cost angle. When an electrician is already on site pulling Romex for outlets, the incremental cost of adding a few dedicated circuits for smart devices is modest. When you call an electrician back for a standalone job, you pay for the trip, the minimum service charge, and the drywall repair. Homeowners who plan smart home technology during a renovation routinely save hundreds to thousands of dollars compared with adding the same capability afterward.
Finally, renovation is when you make decisions about layout, lighting, and materials. A smart lighting plan only works if the fixture locations, switch boxes, and dimming loads are specified before the electrical rough-in. A video doorbell only works well if a transformer and doorbell wiring are placed correctly. Planning smart home systems alongside your design choices prevents the awkward compromises that come from bolting automation onto a finished house.
The Pre-Wiring Decisions That Are Cheap During Demolition
If you take one thing from this article, make it this: the cables you run behind the walls matter more than the devices you install on day one. Devices get replaced every few years; structured cabling can serve the house for decades. During demolition and rough-in, the following pre-wiring work is inexpensive and high leverage.
- Cat6 or Cat6a runs to key locations: Run Ethernet to the rooms where you will place a TV, a desk, a Wi-Fi access point, or a home office. Hardwired access points beat mesh systems in larger homes, and a wired backhaul is the most reliable foundation for automation.
- Neutral wires at every switch box: Most smart switches require a neutral wire. Confirm with your electrician that every switch location has one, including three-way and dimmer locations. This is a code requirement in most new work but is worth verifying explicitly.
- Deep switch boxes: Smart dimmers and switches are physically larger than standard devices. Specifying deeper boxes (or adding a box extension) prevents the cramped, heat-trapping installations that shorten device life.
- Dedicated circuits for high-draw or always-on equipment: A network rack, a home server, or a multi-panel smart lighting system benefits from a dedicated circuit. Ask your electrician to plan for it during the panel upgrade or circuit layout.
- Conduit from the utility area to key rooms: A piece of smurf tube or ENT conduit from the basement or utility closet to the attic and to the living room gives you a future path for cable you have not imagined yet. It is one of the cheapest future-proofing moves in a renovation.
These items are inexpensive because they happen while walls are open. The labor to drill a few studs and pull cable is trivial compared with the drywall repair required later. For a deeper look at how to sequence these decisions across a full project, see this guide to smart home integration in a remodel, which walks through the phases from design to final trim.
Smart Home Technology Worth Installing During a Renovation: The Devices That Age Well
Not all smart devices are created equal. Some are built on open standards and local control, which means they keep working even when a cloud service shuts down or a manufacturer changes its business model. Others are locked to a single app and a subscription. During a renovation, prioritize the former. The following categories represent the smart home technology worth installing during a renovation because they combine reliability, longevity, and strong integration with the rest of your system.
Smart Lighting and Lighting Control
Lighting is the backbone of most automation routines, and it is also where renovation planning pays off most. Decide early whether you want smart bulbs, smart switches, or a centralized lighting control system. Smart switches are generally the better choice for renovations because they work with standard bulbs and keep manual control at the wall. If you are doing a major remodel with many circuits, a panelized lighting system can simplify wiring and give you keypad control, though it requires an electrician comfortable with low-voltage control wiring.
Whatever you choose, insist on dimming that matches your fixture loads. LED compatibility issues are the most common cause of flicker and buzz in smart lighting. Ask your electrician and lighting supplier to confirm compatibility before the fixtures are ordered, and specify dimmers rated for the load type you are installing.
Smart Thermostats and HVAC Zoning
A smart thermostat is one of the highest-return smart devices in most homes, but its value multiplies when it is paired with zoning. If your renovation includes HVAC work, ask your contractor about zone dampers and separate thermostat runs for floors or wings of the house. A zoned system with smart thermostats can cut energy waste in rooms you rarely use and improve comfort in problem areas like upstairs bedrooms.
Thermostats also need a C-wire (common wire) for reliable operation. Confirm the HVAC contractor will provide one at each thermostat location. If your system lacks a C-wire, a renovation is the time to add it rather than relying on power-stealing adapters that cause problems with some equipment.
Smart Locks and Door Hardware
Smart locks are convenient, but they are also a security device, so choose carefully. During a renovation, the important work is at the door frame and the wiring. If you want a video doorbell, run doorbell wiring and a compatible transformer to the front door location. If you want a keypad lock, confirm the door preparation and deadbolt spacing match the hardware you plan to install.
Prefer locks that support local control and standard protocols where possible, and avoid models that require a subscription for basic functions. A lock that works with a keypad and a physical key is a sensible hedge against app outages or battery failure.
Smart Security and Sensors
Security sensors, door and window contacts, and leak detectors are inexpensive and easy to install, but they perform best on a reliable network. If you are remodeling, plan for a security panel location with power and network access, and consider hardwired sensors for doors and windows that are being replaced anyway. Hardwired contacts never need batteries and are less likely to be tampered with.
Water leak sensors are a particularly good renovation addition. Place them near the water heater, washing machine, dishwasher, and under sinks. A leak sensor that triggers a shutoff valve can prevent thousands of dollars in water damage, and the wiring is simple if you plan for it during plumbing rough-in.
Network and Power: The Foundation of Reliable Automation
Most smart home frustrations trace back to weak Wi-Fi, overloaded routers, or poorly placed access points. A renovation is the ideal time to build a network that can handle dozens of connected devices without constant dropouts. Start by planning a wired backbone: a central location for your modem, router, and switch, with Ethernet runs to the rooms and ceiling locations where you will place access points.
For power, think beyond the standard outlet layout. Smart devices often live in closets, cabinets, and ceilings where no outlet was planned. Add outlets in the pantry for a hub, in the hallway closet for a network switch, and near the ceiling for access points or motorized shades. If you are installing motorized blinds or shades, confirm power is available at each window before the drywall goes up; battery-powered shades are convenient but require regular maintenance.
Also plan for surge protection and a small uninterruptible power supply for your network equipment. A brief power flicker should not take down your automation system for an hour while it reboots. A UPS on the router and hub keeps the network alive during short outages and protects equipment from surges.
Coordinating Low-Voltage Work With Your General Contractor
Low-voltage work, which includes networking, security, audio, and automation wiring, is often the step that falls through the cracks in a renovation. The general contractor manages the schedule, the electrician handles line voltage, and the low-voltage installer needs access at the right moment. If those three parties are not coordinated, you end up with cables run after insulation, boxes in the wrong place, or no pathway at all.
The solution is to bring the low-voltage plan into the pre-construction conversation. Provide your general contractor with a simple drawing showing device locations, cable types, and the central equipment location. Ask that the low-voltage rough-in be scheduled immediately after the electrical rough-in and before insulation and drywall. Confirm who is responsible for each cable: some electricians will pull low-voltage cable, and some will not. Get that in writing in the scope of work.
If you are hiring trades directly, a platform that connects homeowners with vetted local professionals can simplify the process. Services like Repairmen help homeowners find licensed contractors for electrical, networking, and remodeling work, which is useful when you need a low-voltage specialist who can coordinate with your general contractor. Whoever you hire, insist on a walkthrough before drywall goes up so you can verify every cable location and every box.
Devices to Approach With Caution During a Renovation
Some smart devices are better added later, after the house is finished and you know how you actually live in it. Built-in appliances with proprietary smart features, for example, are often locked to a single ecosystem and may not integrate with your broader system. If a smart refrigerator or oven requires a dedicated app and offers no local control, treat its smart features as a bonus rather than a reason to buy.
Similarly, avoid hardwiring devices that are likely to be replaced within a few years. Cheap smart bulbs, novelty sensors, and first-generation gadgets may not support the protocols your system uses in five years. It is better to run the cable and install a standard fixture now, then add the smart device when the technology matures. The general rule: wire for the future, but buy devices for the present.
Finally, be skeptical of any device that requires a cloud subscription for basic functionality. Subscriptions add up, and a service that shuts down can leave your hardware useless. Prefer devices that support local control through standards like Matter, Zigbee, or Z-Wave, and that can operate without an internet connection for core functions.
A Practical Checklist for Your Renovation
To turn these ideas into action, bring a short checklist to your next meeting with your contractor and electrician. The goal is not to specify every device; it is to make sure the infrastructure decisions are made before the walls close.
- Confirm neutral wires and deep boxes at all switch locations, including three-way and dimmer circuits.
- Plan Ethernet runs to the office, living room, and ceiling access point locations, plus conduit from the utility area to the attic.
- Specify a dedicated circuit and outlet for the network equipment location.
- Confirm C-wire at each thermostat and doorbell transformer compatibility for the video doorbell.
- Schedule the low-voltage rough-in after electrical rough-in and before insulation, with a walkthrough before drywall.
Review the checklist with your general contractor and get the responsibilities written into the scope of work. A few hours of planning during pre-construction can save days of rework and thousands of dollars in change orders.
Smart home technology is at its best when it is invisible: lights that respond to routines, a thermostat that learns your schedule, a network that never drops, and a security system that quietly does its job. None of that happens by accident. It happens when homeowners treat connectivity and power as part of the renovation plan rather than an afterthought. If you are planning a remodel this year, start the conversation about low-voltage infrastructure early, choose devices that respect open standards, and coordinate the trades so the wiring is in place before the drywall goes up. That is how you get a smart home that stays smart long after the renovation is finished.