
Winter Home Maintenance Checklist: Protect from Cold Weather
Use this winter home maintenance checklist to protect from cold weather and avoid costly repairs. Call 8337004293 for professional help.
By Margaret Sheridan
Learn more about Weatherization for guides, costs, and what to expect.
Compare Weatherization Pros Near You

Enter your ZIP code to compare top-rated local professionals and request free quotes.
The first hard freeze of the season has a way of exposing every weak point in a house at once. A pipe that survived a decade of mild winters suddenly bursts behind a kitchen wall. An ice dam forms along the eaves, and water starts dripping through the ceiling two days later. According to the Insurance Information Institute, water damage from frozen and burst pipes ranks among the most common and most expensive homeowner claims in the United States, with the average claim running into five figures. None of that damage is random. It follows a short list of preventable failures, and every item on that list can be addressed in a single weekend before temperatures drop. This winter home maintenance checklist exists for exactly that purpose: to help you protect from cold weather systematically instead of reacting to it one emergency at a time.
Start With the Building Envelope
The envelope of your home (the roof, walls, windows, doors, and foundation) is the first line of defense against freezing temperatures. Most winter damage begins when the envelope fails at a single point and water or cold air finds a path inside. Before you think about anything else on this checklist, walk the exterior of your home and inspect it the way a claims adjuster would.
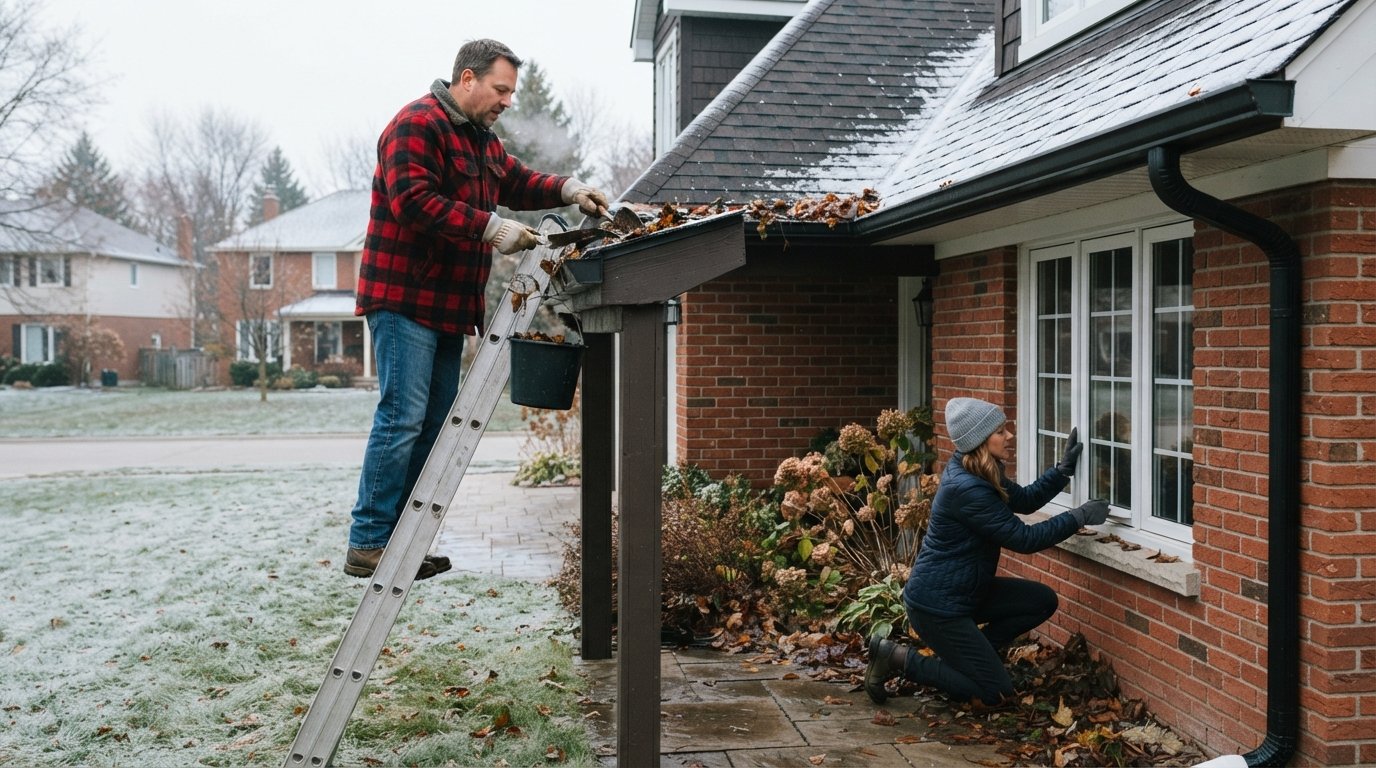
On the roof, look for missing or lifted shingles, cracked flashing around chimneys and vents, and any sign of sagging. If your home has gutters, clear them completely. A gutter packed with leaves and twigs in November becomes a solid block of ice in January, and that ice forces meltwater backward under the roof edge, where it refreezes and expands. Ice damming is one of the leading causes of winter ceiling stains, and it almost always traces back to clogged drainage.
Windows and doors deserve the same scrutiny. Check the weatherstripping around every exterior door and the caulking around every window frame. According to the U.S. Department of Energy, air leaks around windows and doors can account for a significant share of a home's heating loss, which means every gap you seal is money you keep in your pocket all season. Where you find cracked caulk, remove it fully and reapply a exterior-grade sealant rated for low temperatures. Where weatherstripping is compressed or torn, replace it.
While you are outside, note anything that requires a professional eye. Roof repairs, window replacement, and siding work are jobs where the cost of a mistake far exceeds the cost of hiring a pro. Platforms like USremodel connect homeowners with vetted local contractors for exactly this kind of pre-winter work, and it is far easier to schedule a roofer in October than to find one during the first thaw after a storm.
Protect Your Plumbing Before the First Freeze
Water is the single most destructive force in a winter home, and your plumbing is where it does the most damage. A pipe does not need to be outdoors to freeze. Pipes in unheated basements, crawl spaces, attics, garages, and exterior walls freeze just as readily, and when they thaw, the water escapes into drywall, insulation, and flooring. The Insurance Institute for Business and Home Safety estimates that the cost of repairing a burst pipe and its water damage can easily reach tens of thousands of dollars once you account for mold remediation and structural repairs.
The good news is that pipe protection is one of the cheapest and most effective items on any winter home maintenance checklist. Work through these steps before the first hard freeze:
- Disconnect all garden hoses, drain them, and store them indoors. A hose left attached traps water in the faucet and the pipe behind it, and that trapped water is what splits the pipe.
- Shut off exterior hose bibs from the interior valve if your system has one, then open the exterior spigot to let any remaining water drain out.
- Insulate exposed pipes in unheated spaces with foam pipe sleeves, especially within three feet of exterior walls.
- Locate your main water shutoff valve and confirm it turns freely. In an emergency, you will have seconds, not minutes, to find it.
- Keep cabinet doors under kitchen and bathroom sinks open during cold snaps so warm indoor air circulates around the pipes.
If you are leaving town for more than a day or two during winter, do not simply turn the thermostat down and hope for the best. Either keep the heat at a minimum of 55 degrees Fahrenheit, or shut off the main water supply and drain the system completely. A weekend trip to visit family should never end with a flooded basement.
Heating System Tune-Up and Safety Checks
Your heating system will run more in the next four months than it did all last year combined, and a furnace that fails on the coldest night of the year is both a comfort crisis and a safety hazard. Schedule a professional inspection before the heating season begins. A technician will clean the burners, check the heat exchanger for cracks, test the blower, and verify that the system is venting properly. This is not a task to handle yourself: carbon monoxide leaks from a cracked heat exchanger are invisible and potentially fatal.
Change your furnace filters monthly during heavy-use months. A clogged filter forces the system to work harder, raises your energy bill, and shortens the life of the equipment. If you use a wood-burning fireplace, have the chimney inspected and swept annually. Creosote buildup is the leading cause of chimney fires, and it accumulates faster than most homeowners realize. For gas fireplaces, verify the pilot light and check that the vents are unobstructed.
Do not overlook the smaller heating details. Space heaters should sit at least three feet from anything flammable and should never be left running unattended or overnight. If your home has a whole-house humidifier, replace the water panel before the season starts. And if your HVAC system is more than 15 years old and has needed repeated repairs, a pre-winter conversation about replacement is far better than a mid-January emergency call. USremodel's network includes HVAC professionals who can assess your system and provide quotes before the cold arrives.
Insulation, Attic, and Ventilation
Heat rises, which means your attic is where you lose the most of it. If your attic insulation is thin, compressed, or uneven, your furnace is fighting a losing battle all winter. The U.S. Department of Energy recommends attic insulation levels of R-49 to R-60 for most of the northern United States and R-30 to R-49 for milder climates. Adding insulation is one of the highest-return home improvements available, and it pays you back every month through lower heating bills.
Ventilation matters just as much as insulation, and the two must work together. An attic needs proper intake and exhaust ventilation to keep moisture from condensing on the underside of the roof deck. When warm, moist air from the living space leaks into a poorly ventilated attic, it condenses, freezes, and eventually causes rot, mold, and ice dams. Check that soffit vents are not blocked by insulation and that ridge or roof vents are clear.
While you are in the attic, look for signs of trouble: dark stains on the roof deck, daylight showing through gaps, or damp insulation. Each of these points to a problem worth fixing before winter makes it worse. If you find issues you cannot diagnose confidently, a professional inspection is the right call. The guide on why hiring verified remodeling contractors protects your home explains how to vet professionals for exactly this kind of work.
Exterior Maintenance Beyond the Roof
Winter does not only attack from above. The ground around your foundation, the driveway, and the landscaping all play a role in how well your home weathers the season. Start with drainage. Make sure the ground slopes away from the foundation on all sides. If soil has settled over the years and now slopes toward the house, add fill and regrade it. Meltwater that pools against the foundation finds its way into basements and crawl spaces, where it freezes, expands, and causes structural cracks.
Extend downspouts at least five to six feet from the foundation so roof runoff discharges well away from the walls. If you have a sump pump, test it by pouring water into the pit and confirming it activates and discharges properly. A sump pump that fails during a winter thaw is a flooded basement waiting to happen, so test it now and consider a battery backup if you do not have one.
Trim tree branches that hang over the roof or power lines. Snow and ice add enormous weight to limbs, and a branch that looks harmless in summer can snap under a winter storm and take shingles, gutters, or electrical service with it. Also drain and store outdoor fountains, irrigation systems, and pool equipment according to the manufacturer's instructions. Standing water left in these systems cracks pipes and pumps when it freezes.
Winter Storm Emergency Kit
Even a perfectly maintained home can lose power during an ice storm or blizzard. The difference between an inconvenience and a crisis is preparation. Put together a winter emergency kit now, before you need it, and store it somewhere you can reach in the dark.
At minimum, your kit should include flashlights and extra batteries, a battery-powered or hand-crank radio, bottled water and non-perishable food for at least three days, a first-aid kit, blankets and warm clothing, a manual can opener, and a supply of any prescription medications. If you have a generator, test it before winter and store fuel safely. Never run a generator indoors, in a garage, or near a window; carbon monoxide from generators kills dozens of Americans every year.
Keep a list of emergency contacts, including your utility company, your plumber, and your HVAC provider, somewhere other than your phone. After a major storm, phone systems and internet service often fail even when cell towers stay up, and a paper list costs nothing to keep in a drawer.
When to Call a Professional
A winter home maintenance checklist is something every homeowner can and should work through. But several items on this list cross the line from maintenance into skilled trades, and attempting them yourself can void warranties, violate building codes, or create safety hazards. Roof work, electrical repairs, HVAC service, and major plumbing all belong in the hands of licensed professionals.
This is where a service like 180 Remodel becomes useful. Rather than calling a dozen contractors one at a time and hoping for a callback before the next freeze, you can submit your project once and receive multiple quotes from local professionals. That competition keeps pricing honest and gives you options when one contractor is booked solid. The same principle applies to any winter prep task you would rather delegate: window replacement, insulation upgrades, heating repairs, or emergency plumbing work.
One practical tip: schedule professional work in early autumn whenever possible. Contractors are busiest from late November through February, and prices for emergency calls reflect that demand. A furnace tune-up in September costs a fraction of an emergency repair in January, and a roofer booked in October will do a more thorough job than one rushing between storm damage calls in December.
Build the Checklist Into Your Routine
The most effective winter home maintenance checklist is not a one-time event. It is a rhythm. Walk your property once in early autumn to handle the big-ticket items: roof inspection, gutter cleaning, heating tune-up, and pipe insulation. Do a quick mid-winter check in January to confirm that filters are clean, vents are clear, and no new leaks have appeared. Then do a post-winter review in March to catch damage while it is still fresh and repair it before spring rains arrive.
Homeowners who follow this rhythm consistently spend less on repairs, face fewer emergencies, and often see lower insurance premiums because carriers reward well-maintained properties. The work itself is not glamorous, but it is the difference between a house that shrugs off winter and one that spends the season springing leaks. Start at the top of the envelope, work your way down through plumbing and heating, and finish with the exterior and emergency preparations. By the time the first freeze arrives, you will have already done the hard part.
Learn more about Weatherization for guides, costs, and what to expect.
Compare Weatherization Pros Near You
Enter your ZIP code to compare top-rated local professionals and request free quotes.