
Solar Panel Installation Process for Homes: Step-by-Step
Learn the solar panel installation process for homes, from site assessment to final grid connection, and avoid costly surprises.
By Justin Blake
Learn more about Solar Panel Installation and Repair for guides, costs, and what to expect.
Compare Solar Panel Installation and Repair Pros Near You

Enter your ZIP code to compare top-rated local professionals and request free quotes.
Switching to solar energy is a major decision, and the installation process can feel like a mystery. You might worry about roof damage, hidden costs, or weeks of disruption. In reality, the solar panel installation process for homes is a well-defined journey that, when handled by professionals, is smoother than most homeowners expect. This guide breaks down each stage, from the initial site assessment to the final connection with your utility company, so you know exactly what is happening and why it matters.
Why Understanding the Process Matters
Knowing what to expect protects you from surprises. A reputable solar installer will not just show up and bolt panels to your roof. They will first conduct a thorough evaluation of your property, your energy usage, and your electrical system. This upfront work determines the size of your system, the type of panels, and the projected savings. Without this clarity, you could end up with a system that underperforms or costs more than necessary.
Moreover, understanding the steps helps you coordinate with your contractor, your utility company, and any local permitting offices. It also gives you the confidence to ask the right questions. For example, you will know to ask about the inverter type, the warranty terms, and how the crew protects your landscaping during the roof work. This knowledge turns you from a passive observer into an informed participant in the solar panel installation process for homes.
Step 1: Site Assessment and Energy Audit
The process begins with a professional site visit. A solar designer will examine your roof's condition, angle, orientation, and shading. They will also review your electricity bills to understand your average monthly consumption. This audit is not a formality; it is the foundation of your system design.
During this visit, the installer will check for potential obstructions like chimneys, skylights, or nearby trees that could cast shadows. They will also evaluate your roof's structural integrity. If your roof is more than 10 years old or has damaged shingles, you might need to repair or replace it before the solar panels go on. This is a crucial point in the solar panel installation process for homes because it prevents future leaks and ensures the panels have a secure base.
You should also discuss your energy goals. Are you trying to offset 100% of your usage, or are you looking to reduce a portion of your bill? This answer influences the system size and the number of panels. A good installer will not oversize your system just to increase their profit; they will design a system that matches your needs and budget.
What to Prepare for the Assessment
- Your last 12 months of electricity bills to show seasonal usage patterns.
- Details about any planned home additions or electric vehicle purchases that might increase your energy needs.
- A list of questions about panel brands, inverter options, and monitoring systems.
- Your homeowner's insurance information to verify coverage during the installation.
- Access to your attic and electrical panel for the inspector.
Once the assessment is complete, the installer will provide a proposal with a system design, equipment specifications, and a detailed cost estimate. This is also when they will discuss financing options, including cash purchases, solar loans, or leases. Take your time to compare offers from multiple contractors, as prices and equipment quality can vary significantly.
Step 2: Design and Engineering
After you approve the proposal, the solar company's engineering team will create a detailed design plan. This plan includes the exact placement of every panel, the routing of conduit, and the location of the inverter and battery (if you choose to include storage). The design must comply with local building codes, fire safety regulations, and utility interconnection standards.
For many homeowners, this phase is surprisingly quick, often taking one to three weeks. The installer will also prepare the necessary permit applications. Depending on your city or county, the permitting process can take anywhere from a few days to several weeks. A professional installer will handle all the paperwork, but you should stay informed about the status. Some municipalities require a structural review of your roof, especially in areas prone to high winds or snow loads.
During this stage, you might also need to sign an interconnection agreement with your utility company. This agreement outlines how your system will connect to the grid and how you will be credited for excess energy through net metering. Your installer should guide you through this paperwork, but it is wise to understand the terms, as they affect your long-term savings.
Step 3: Permitting and Approvals
No solar panel installation process for homes is complete without the proper permits. This step is not just bureaucratic red tape; it ensures your system is safe and meets all local standards. The solar company will submit your design plans to the local building department, and an inspector will review them for compliance with electrical and structural codes.
Depending on where you live, you may also need a separate electrical permit. Some jurisdictions require a home energy rating or a solar readiness assessment. Your installer should have experience with the local permitting process and be able to expedite approvals. However, be prepared for potential delays if the building department is backed up or if your design needs revisions.
While permits are being processed, you can use this time to finalize your financing and confirm the installation date. You should also contact your homeowner's association (HOA) if you have one, as some HOAs have aesthetic requirements for solar panels. Your installer will not handle HOA approvals unless you ask, so take the initiative to submit the necessary forms.
Step 4: Installation Day
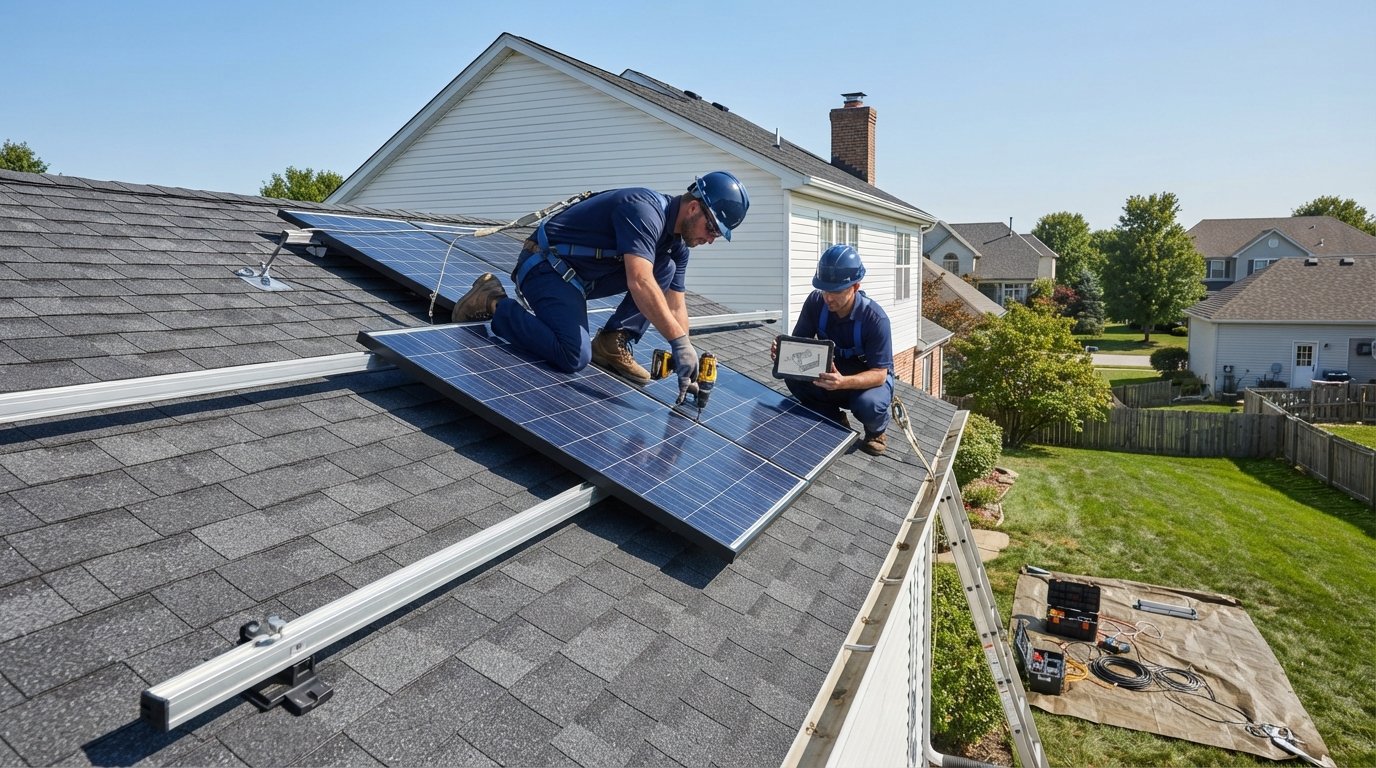
The actual installation is the most visible part of the solar panel installation process for homes. For a typical residential system, the work takes one to three days, depending on the complexity of your roof and the size of the system. On the first day, the crew will set up safety equipment, protect your landscaping with tarps, and stage the materials on the roof.
The crew will begin by installing the mounting system, which is a set of rails that secure the panels to your roof. They will then attach the panels to the rails and connect the wiring. The electrical work involves running conduit from the panels to your inverter and then to your main electrical panel. This is where the system becomes live, but only temporarily for testing.
You should expect some noise and minor disruption, but a professional crew will keep the work area clean and tidy. They will also walk you through the system components and show you the monitoring setup. Do not hesitate to ask questions during the installation; it is your home, and you have a right to understand what is being installed.
What to Expect on Installation Day
- A brief inspection of the work area before the crew begins.
- Use of power tools and drilling equipment, so expect some noise.
- Frequent trips by the crew to and from the roof, so keep the driveway clear.
- A final walkthrough with the lead installer to review the system's operation.
After the installation, the crew will perform a system test to ensure everything is wired correctly. They will also switch on the inverter and check the monitoring app to confirm that the panels are generating power. However, your system will not be officially connected to the grid until a local inspector approves the work.
Step 5: Inspection and Interconnection
The final step in the solar panel installation process for homes is the official inspection. A representative from your city or county will visit your property to verify that the installation meets all code requirements. They will check the wiring, the mounting system, and the electrical connections. If the inspector finds any issues, your installer will fix them and schedule a re-inspection.
Once the inspection is passed, you will receive a Permission to Operate (PTO) from your utility company. This document allows you to turn on your solar system and connect it to the grid. The time between inspection and PTO can vary, sometimes taking a few weeks. During this period, your system is installed but not yet active, so you will continue to draw power from the grid as usual.
After you receive PTO, your installer will activate the system and show you how to use the monitoring software. You will now start generating your own electricity, and any excess power will be sent back to the grid for credits. This is the moment when your solar investment begins to pay off. To ensure your system operates at peak efficiency, schedule regular cleaning and maintenance, and keep an eye on your monitoring dashboard for any unusual drops in production.
Choosing the Right Installer
The success of your solar project depends heavily on the quality of your installation crew. A poorly installed system can lead to roof leaks, electrical issues, and reduced energy production. Therefore, you should prioritize certified and experienced contractors. Look for installers who are licensed, insured, and have a track record of completed installations in your area.
To streamline your search, consider using a platform like 180Remodel to connect with vetted contractors. Such services help you compare quotes from multiple professionals, ensuring you get a fair price and a high-quality installation. They also provide educational resources to help you understand the solar panel installation process for homes, so you can make informed decisions.
When interviewing potential installers, ask for references and check online reviews. Inquire about the warranties on the panels, the inverter, and the workmanship. A reputable installer will offer a 25-year performance warranty on the panels and a 10-year workmanship warranty. Also, confirm that they will handle all permitting and inspection paperwork, as this saves you significant time and hassle.
Financing and Incentives
The solar panel installation process for homes is not just about the physical work; it also involves financial planning. The upfront cost of a solar system can be substantial, but there are several ways to make it more affordable. The federal solar tax credit, for instance, allows you to deduct 30% of the installation cost from your federal taxes. Many states also offer additional rebates or tax incentives.
Beyond incentives, you can choose between a cash purchase, a solar loan, or a solar lease. A cash purchase gives you the highest long-term savings, but it requires a significant initial investment. A solar loan allows you to finance the system with little or no money down, and you will own the system after the loan is paid off. Leases and power purchase agreements (PPAs) require no upfront cost, but you do not own the system, and the savings are often lower.
Your installer should provide a clear breakdown of the costs and projected savings for each financing option. They should also help you apply for any available incentives. Be wary of companies that pressure you to sign a contract before you have compared multiple offers. A transparent installer will encourage you to do your due diligence.
Final Thoughts
Going solar is a significant investment, but it can dramatically reduce your electricity bills and increase your home's value. The solar panel installation process for homes is a structured journey that, with the right contractor, can be completed with minimal stress. By understanding the steps, you can navigate the process with confidence and enjoy the benefits of clean energy for decades.
Remember to start with a thorough site assessment, obtain multiple quotes, and verify that your chosen installer is licensed and insured. After the installation, stay engaged with the inspection and interconnection process to ensure a smooth transition to solar power. With careful planning and the right professional guidance, your home can become a model of energy independence.
Learn more about Solar Panel Installation and Repair for guides, costs, and what to expect.
Compare Solar Panel Installation and Repair Pros Near You
Enter your ZIP code to compare top-rated local professionals and request free quotes.