
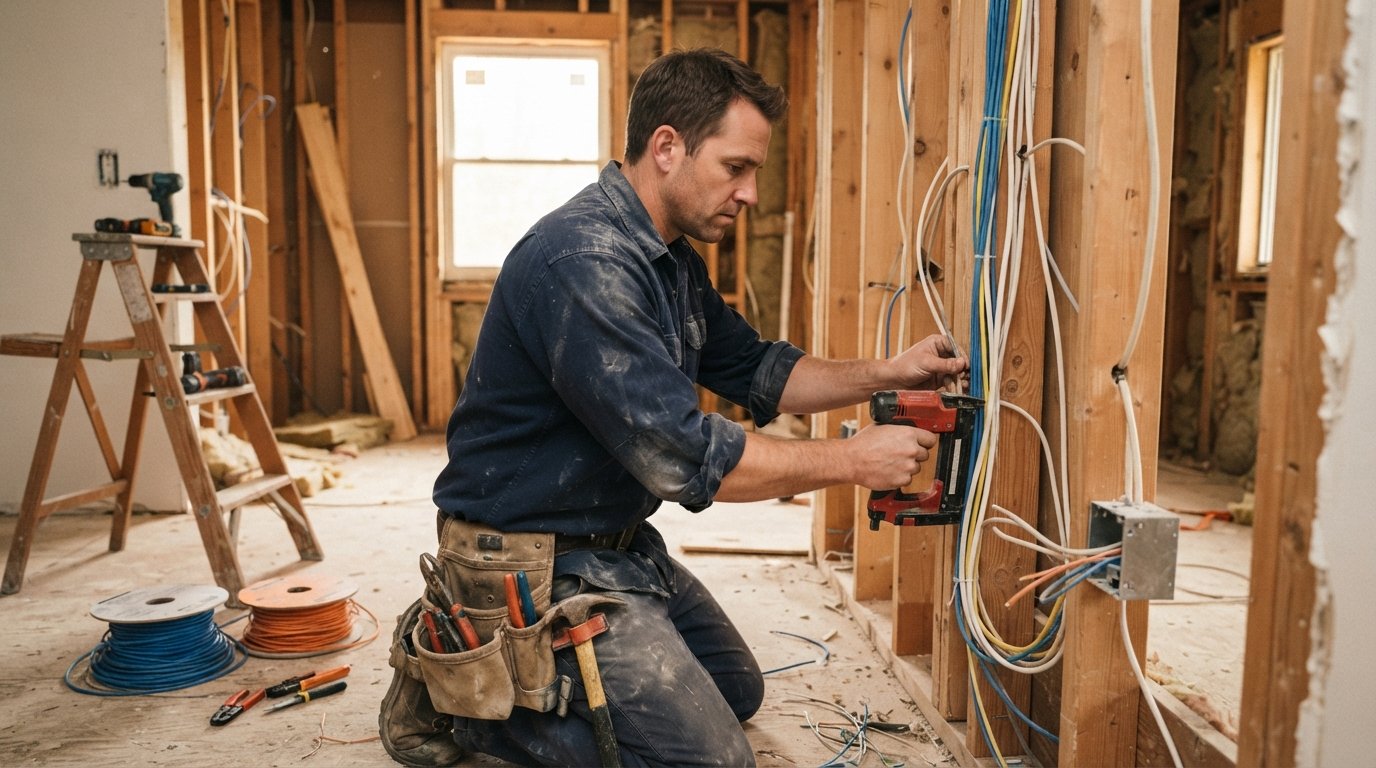
Smart Home Wiring Upgrades to Plan During Renovation
Plan smart home wiring upgrades during renovation to avoid costly retrofits. Call (833)-700-4293 for expert contractor quotes and project guidance.
By Danica Leslie
Learn more about Wiring Installation for guides, costs, and what to expect.
Compare Wiring Installation Pros Near You

Enter your ZIP code to compare top-rated local professionals and request free quotes.
You are staring at exposed studs, tangled wires, and a once-in-a-decade opportunity. The walls are open, the dust is flying, and every decision you make right now will shape how your home performs for the next twenty years. Most homeowners focus on paint colors and cabinet hardware, but the smartest investment you can make during a renovation is invisible: the wiring infrastructure that powers modern living. Planning smart home wiring upgrades during renovation is not about chasing gadgets. It is about installing a nervous system that lets your home adapt as technology evolves, without tearing open drywall again. This guide walks you through the critical decisions, from structured cabling and outlet placement to dedicated circuits and contractor coordination, so you can future-proof your home while the walls are still open.
Why Renovation Is the Best Time for Smart Home Wiring Upgrades
Retrofitting smart home wiring after a renovation is expensive and disruptive. Once drywall goes up and paint dries, adding a single Ethernet drop can cost hundreds of dollars in drywall repair and repainting. During a renovation, the marginal cost of running cable is often just the wire itself and a few hours of labor. The walls are open, the framing is exposed, and your electrician is already on site. This is the moment to think beyond code-minimum electrical work and design a low-voltage backbone that supports everything from Wi-Fi access points to security cameras.
Beyond cost savings, renovation planning gives you the chance to coordinate trades. Electricians, low-voltage technicians, and general contractors can work in sequence rather than stepping on each other's toes. You can map outlet locations to furniture layouts, ensure dedicated circuits for high-draw devices, and run conduit for future upgrades. The result is a home that feels modern today and remains adaptable tomorrow. If you are still shaping your overall approach, our guide on what smart home remodeling involves provides a useful foundation before you dive into wiring specifics.
The key is to treat wiring as part of the renovation scope from day one. Do not let it become an afterthought once the drywall crew arrives. Bring your low-voltage plan to your general contractor early, ideally during the design phase, so it can be priced and scheduled alongside electrical rough-in. This proactive approach prevents change orders and ensures your smart home wiring upgrades are integrated smoothly.
Structured Cabling and Conduit: The Backbone of a Smart Home
Structured cabling is the unsung hero of a reliable smart home. While Wi-Fi handles most mobile devices, a wired backbone provides stability for devices that never move: televisions, desktop computers, security cameras, and network access points. During renovation, run Cat6 or Cat6a Ethernet cable from a central wiring closet (often near your electrical panel) to key locations in every room. This central point becomes your distribution hub for internet, television, and low-voltage systems.
Conduit is your insurance policy against obsolescence. Even if you do not need fiber optic cable today, installing empty conduit from the basement to the attic and to key rooms lets you pull new cable later without opening walls. Use 3/4-inch or 1-inch conduit for main runs, and leave pull strings inside. This is especially valuable for home offices and entertainment areas where technology changes quickly. A well-planned structured cabling system also reduces wireless congestion by offloading heavy data traffic to wired connections.
When planning outlet placement, think about furniture and traffic flow. Outlets should be located where lamps, chargers, and smart displays will actually sit, not just where code requires them. Consider adding outlets inside cabinets for charging stations, near ceiling corners for smart speakers, and at waist height for easy access. The following list summarizes the core structured cabling elements to include in your renovation plan:
- Cat6 or Cat6a Ethernet runs to each room, especially home office, living room, and bedrooms.
- Empty conduit from the utility area to attic and key rooms for future cable pulls.
- Central wiring closet with power, ventilation, and space for a network switch and patch panel.
- Coaxial cable for cable TV or antenna distribution, if you still use those services.
- Flexible conduit to media niches and wall-mounted TV locations for HDMI and audio cables.
After installing the backbone, label every cable at both ends. This simple step saves hours of frustration later when you or a technician need to trace a connection. A neatly organized patch panel in the wiring closet turns a tangled mess into a professional installation that any smart home integrator will appreciate.
Low-Voltage Wiring for Cameras, Speakers, and Sensors
Low-voltage wiring covers the devices that make a home smart and secure: security cameras, in-ceiling speakers, motion sensors, doorbell cameras, and environmental monitors. These systems typically run on 12 to 24 volts or Power over Ethernet (PoE), which means they can use the same Cat6 cable as your data network. PoE is a game-changer because it delivers both power and data over a single cable, simplifying installation and reducing the need for nearby electrical outlets.
Plan camera locations at exterior corners, above entry doors, and along driveways. Run Cat6 cable from each location back to your wiring closet or a PoE switch. For interior speakers, decide between in-ceiling and in-wall models, and run 16/2 or 14/2 speaker wire from a central audio distribution point to each speaker location. Even if you are not installing speakers now, running the wire is inexpensive and saves future drywall work. Sensors for doors, windows, and motion can be wired or wireless, but wired sensors are more reliable and do not require battery changes.
Do not forget the doorbell. A wired doorbell camera requires a transformer and low-voltage wire, which is much easier to install during renovation than after. Similarly, smart thermostats often need a C-wire (common wire) for continuous power. Check your HVAC wiring during the renovation and add a C-wire if missing. The following are key low-voltage systems to plan for:
- PoE security cameras at entries, garage, and perimeter.
- In-ceiling or in-wall speakers for multi-room audio.
- Wired door and window sensors for a robust security system.
- Smart doorbell with low-voltage transformer.
- Environmental sensors for temperature, humidity, and air quality.
Coordinate low-voltage wiring with your electrician to avoid interference. Keep low-voltage cables at least 12 inches away from parallel runs of electrical wire, and cross them at right angles when necessary. This reduces electromagnetic interference that can degrade network and audio signals. A licensed low-voltage contractor or a smart home integrator can handle this work, but your general contractor should schedule it alongside electrical rough-in.
Dedicated Circuits and Panel Capacity for Smart Devices
Smart homes draw more power than many older electrical panels were designed to handle. From EV chargers and heat pump water heaters to home servers and whole-house surge protectors, modern devices demand dedicated circuits. During renovation, upgrade your electrical panel if it is outdated or has limited spaces. A 200-amp panel is now standard for many homes, and it provides room for future additions. If you are adding a major appliance or an electric vehicle charger, you may need a subpanel or a service upgrade.
Dedicated circuits are essential for devices that should not share power with other loads. For example, a home network rack, a refrigerator, or a home theater system can benefit from a dedicated circuit to prevent nuisance tripping. In kitchens, smart appliances like induction cooktops and smart ovens often require dedicated 240-volt circuits. Plan these with your electrician early so the wiring is in place before drywall. The following list outlines circuits to consider:
- EV charger circuit (240V, typically 40-60 amps) in the garage.
- Dedicated circuit for home network equipment and server rack.
- Dedicated circuit for home theater or media room.
- Circuit for smart water heater or heat pump.
- Circuit for outdoor smart lighting or irrigation controller.
Beyond dedicated circuits, whole-house surge protection is a wise investment. Smart devices are sensitive to power spikes, and a surge protector at the panel can prevent costly damage. Also consider a generator interlock or transfer switch if you live in an area with frequent outages. These upgrades are much easier to install during a renovation when the panel is accessible and walls are open.
When planning your panel, leave at least 20 percent spare capacity for future needs. Technology changes, and you do not want to be stuck without room for the next big thing. A qualified electrician can perform a load calculation to determine your current demand and recommend the right panel size. This is not a DIY task; electrical work is dangerous and must meet local codes.
Coordinating Smart Systems with Electricians and General Contractors
Successful smart home wiring upgrades depend on clear communication among your general contractor, electrician, and low-voltage integrator. The general contractor oversees the schedule and ensures trades do not conflict. The electrician handles line-voltage wiring, panel upgrades, and dedicated circuits. The low-voltage integrator runs structured cabling, installs outlets, and sets up the network. Bring all three together for a pre-construction meeting to review the wiring plan and assign responsibilities.
Document everything in a wiring diagram. Mark the location of every outlet, switch, camera, speaker, and network drop on the floor plan. Share this diagram with all trades. This prevents the classic mistake of an electrician installing a switch box where you planned a network jack, or a low-voltage tech drilling through a water pipe. Clear plans also make inspections smoother and reduce change orders.
Schedule the work in the right order. Rough-in electrical and low-voltage wiring should happen after framing and before insulation and drywall. If you are installing smart glass or motorized blinds, coordinate power and control wiring at the same time. After drywall, the trim-out phase includes installing outlets, switches, and devices. Test every connection before the walls are closed; it is much cheaper to fix a problem now than after painting.
If you need help finding qualified professionals, ContractorHomeQuotes offers a platform to connect with vetted contractors and compare quotes for your renovation. This can simplify the process of hiring electricians and low-voltage specialists who understand smart home wiring. Remember that your general contractor is your primary point of contact, so ensure they are on board with the smart home plan from the start.
Future-Proofing Choices That Avoid Another Remodel Later
Future-proofing is about anticipating change without overbuilding. You do not need to install every conceivable technology, but you should create pathways for upgrades. Conduit is the simplest future-proofing tool: empty tubes in walls let you pull fiber, new Ethernet standards, or proprietary cables later. Similarly, a central wiring closet with extra space and power can accommodate new equipment as your smart home grows.
Choose open standards over proprietary systems. For lighting, consider smart switches that work with multiple platforms rather than bulbs that require a specific hub. For networking, use standard Ethernet and Wi-Fi rather than proprietary mesh systems that may become obsolete. For security, PoE cameras that follow ONVIF standards give you flexibility to mix brands. These choices reduce the risk of being locked into a dead ecosystem.
Plan for wireless access points. Even though you are running wired cable, you will still need robust Wi-Fi. Run Cat6 to ceiling locations in central hallways for ceiling-mounted access points. This provides better coverage than a single router in the corner. If you are building an addition, include conduit and Ethernet runs to the new space. The following are future-proofing strategies to incorporate:
- Install conduit from the utility area to attic and key rooms for future cable pulls.
- Run extra Cat6 cables to each room (two per room is a good rule of thumb).
- Use a central wiring closet with ventilation and power for network gear.
- Choose open-standard devices that integrate with major platforms.
- Leave spare capacity in the electrical panel and conduit for future circuits.
Finally, consider energy management and solar readiness. If you plan to add solar panels or a battery backup, run conduit from the roof to the electrical panel now. Pre-wire for an inverter and monitoring system. These upgrades are much easier during a renovation and can save thousands later. Energy-efficient smart devices, such as smart thermostats and lighting controls, also benefit from proper wiring and can reduce utility bills over time.
Smart home wiring upgrades are an investment in your home's functionality and value. By planning structured cabling, low-voltage systems, dedicated circuits, and future-proofing during renovation, you create a home that is ready for today's technology and tomorrow's innovations. Work closely with your general contractor and electrician to integrate these upgrades seamlessly into your project. When the drywall goes up, you will have peace of mind knowing your home's nervous system is built to last.
Learn more about Wiring Installation for guides, costs, and what to expect.
Compare Wiring Installation Pros Near You
Enter your ZIP code to compare top-rated local professionals and request free quotes.