
Attic Insulation Upgrade Cost and Energy Savings
Attic insulation upgrade cost and energy savings explained: learn payback timelines and rebates. Call (833)-700-4293 for contractor quotes.
By Peter Hubert
Learn more about Insulation Installation or Upgrade for guides, costs, and what to expect.
Compare Insulation Installation or Upgrade Pros Near You

Enter your ZIP code to compare top-rated local professionals and request free quotes.
Your attic is one of the most overlooked areas of your home, yet it can be responsible for up to 30 percent of your heating and cooling losses. If you have ever wondered whether new insulation is worth the investment, the answer usually comes down to two numbers: what you pay upfront and what you save each month. This guide breaks down attic insulation upgrade cost and energy savings so you can decide with confidence. We will look at how to spot an under-insulated attic, compare blown-in, batt, and spray foam options, estimate payback timelines, and identify rebates that can reduce your out-of-pocket expense. Along the way, we will show why professional installation matters and how to connect with qualified contractors through USremodel.
How to Tell If Your Attic Needs an Insulation Upgrade
Before you request quotes, it helps to understand what a properly insulated attic looks like. Insulation is measured by its R-value, which indicates resistance to heat flow. In most U.S. climates, attics should have between R-38 and R-60, depending on your region and local building codes. If you can see the floor joists in your attic, you likely have too little insulation. Another red flag is uneven coverage: insulation that is patchy, compressed, or missing in corners allows heat to escape in winter and enter in summer.
Air leaks are just as important as insulation. Gaps around recessed lights, wiring penetrations, plumbing vents, and the attic hatch let conditioned air escape into the attic. Even a well-insulated attic will underperform if air can move freely through it. A simple way to check for leaks is to look for dirty spots in the insulation, which often indicate air movement. You can also perform a visual inspection on a cool day: if the attic feels noticeably colder or warmer than the rest of the house, you probably have both insulation and air sealing issues.
Homeowners often ask whether they can just add a layer of insulation over the existing material. In many cases, yes, but only if the existing insulation is in good condition and not contaminated by moisture or pests. If the old insulation is compressed, wet, or filled with debris, removal and replacement may be the better path. A professional contractor can assess the condition of your attic and recommend the most cost-effective approach. For a deeper dive into costs and savings, see our attic insulation cost and savings guide.
Comparing Blown-In, Batt, and Spray Foam Insulation
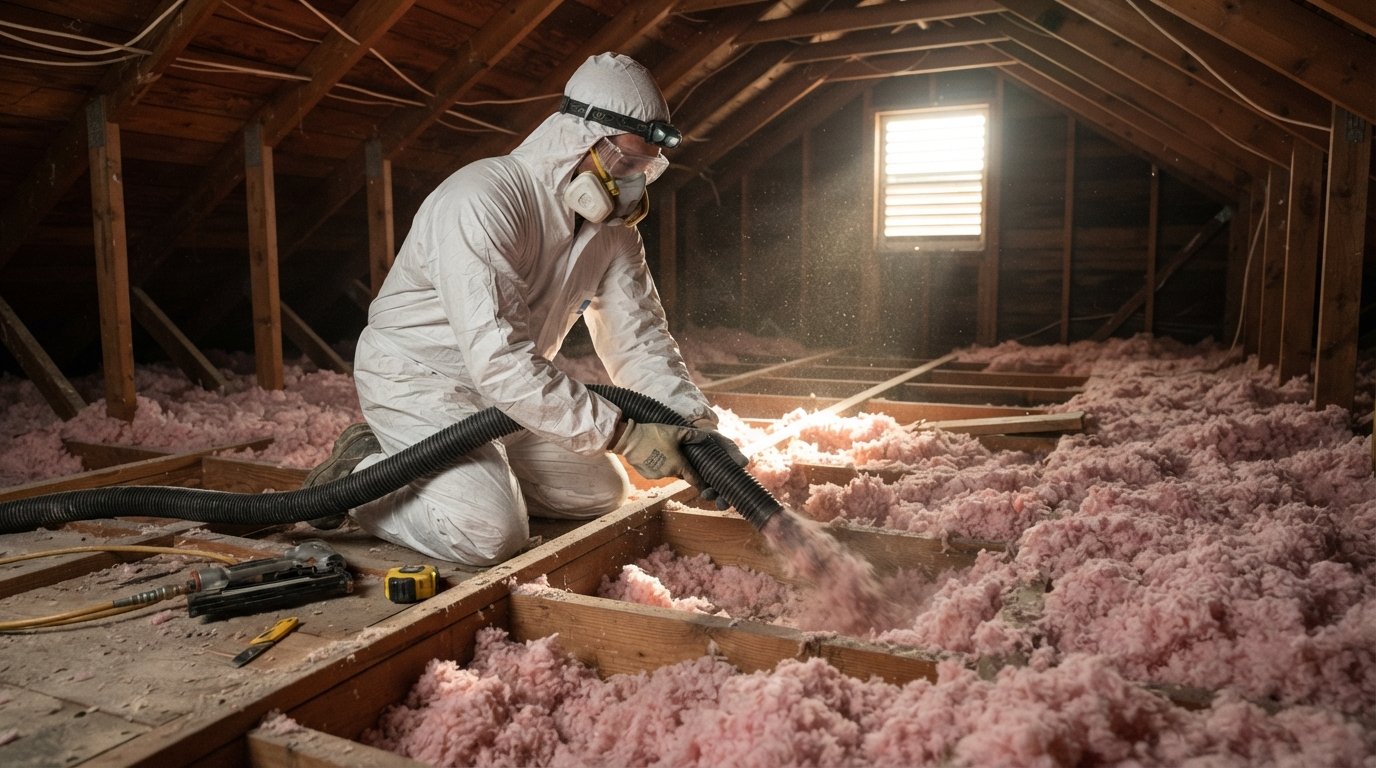
The three most common attic insulation materials are blown-in fiberglass or cellulose, batt (roll) insulation, and spray foam. Each has distinct cost and performance characteristics. Blown-in insulation is loose material that is blown into the attic using specialized equipment. It is excellent for filling irregular spaces and covering existing insulation. Batts are pre-cut rolls of fiberglass or mineral wool that are laid between joists. Spray foam expands on contact and seals gaps as it cures, offering both insulation and air sealing in one step.
Costs vary by material, labor, and region. As a rough guide, blown-in fiberglass or cellulose typically costs between $1.50 and $3.50 per square foot installed, while batts run from $1.00 to $2.50 per square foot. Spray foam is more expensive, often $3.00 to $7.00 per square foot, but it delivers superior air sealing and higher R-values per inch. For a 1,000-square-foot attic, a blown-in upgrade might cost $1,500 to $3,500, while spray foam could range from $3,000 to $7,000. These numbers are estimates; your actual cost depends on attic accessibility, existing insulation removal, and local labor rates.
Performance also differs. Blown-in insulation is affordable and works well for flat attic floors, but it can settle over time and lose some R-value. Batts are easy to install but are prone to gaps and compression if not fitted perfectly. Spray foam provides the best airtight seal and can be applied to rooflines and walls, but it requires professional installation and a curing period. In most attics, a combination of air sealing and blown-in insulation offers the best balance of cost and energy savings. If you want to explore specific pricing for your area, a platform like ContractorHomeQuotes can help you compare local estimates.
- Blown-in fiberglass or cellulose: Best for flat attic floors, good coverage, lower material cost.
- Batt insulation: DIY-friendly but prone to gaps; suitable for standard joist spacing.
- Spray foam: Premium air sealing, higher R-value per inch, higher cost, professional installation required.
When choosing between these options, consider your climate, attic configuration, and budget. In cold climates, spray foam on the roof deck can prevent ice dams, while in mild climates, blown-in insulation on the attic floor is often sufficient. A qualified contractor can model expected energy savings for each option so you can compare payback periods.
Seasonal Energy Bill Impact and Payback Timelines
The energy savings from an attic insulation upgrade depend on your current insulation levels, climate, and energy prices. According to the U.S. Department of Energy, upgrading from R-11 to R-49 in a typical attic can save homeowners 10 to 20 percent on heating and cooling costs. For a household spending $2,000 annually on energy, that translates to $200 to $400 per year. In more extreme climates, savings can be higher. If you also air seal while upgrading, you can capture additional savings by reducing drafts and moisture issues.
Payback period is the time it takes for energy savings to equal your upfront investment. If you spend $2,500 on a blown-in upgrade and save $300 per year, your simple payback is about 8.3 years. Spray foam at $5,000 with $400 annual savings would have a payback of 12.5 years. These are simplified calculations; actual payback depends on future energy prices, insulation performance, and whether you finance the project. Many homeowners find that the comfort benefits, such as fewer drafts and more consistent temperatures, justify the investment even before the payback period ends.
It is also important to consider non-energy benefits. Proper insulation can reduce moisture problems, extend the life of your HVAC system, and improve indoor air quality. If you are planning to sell your home, insulation upgrades can be a selling point, though they may not recoup full cost in resale value. Still, the monthly savings and comfort gains make attic insulation one of the most reliable home efficiency upgrades available. To estimate your specific savings, use the DOE's Home Energy Saver tool or ask a contractor for a customized projection.
Rebates and Efficiency Incentives for Attic Insulation
Before you pay full price, check for rebates and tax incentives. Many utility companies offer rebates for attic insulation upgrades, often $100 to $500 or more, especially if you improve efficiency by a certain percentage. The federal government also offers tax credits for certain insulation materials through the Inflation Reduction Act. In 2026, homeowners may qualify for a tax credit of up to 30 percent of the cost, capped at $1,200 per year for insulation and air sealing. State and local programs vary widely, so it is worth checking your state energy office website.
To qualify for rebates, you usually need to work with a licensed contractor and provide proof of purchase and installation. Some programs require a pre-upgrade energy audit. Keep all receipts and documentation. Your contractor may be able to help you navigate the paperwork, as they are often familiar with local incentive programs. When comparing quotes, ask each contractor whether they participate in rebate programs and whether they can handle the submission for you. This can simplify the process and ensure you do not miss out on savings.
Stacking incentives is often possible. For example, you might combine a utility rebate with a federal tax credit and a local program. However, some programs have caps or cannot be combined. Read the fine print carefully. A good contractor will provide a detailed estimate that includes expected incentives, so you can see the net cost. Be wary of contractors who promise unrealistically high rebates or who ask you to sign over your rebate check. Always verify program details directly with the sponsoring organization.
Why Professional Installation Matters
Attic insulation may seem like a straightforward job, but proper installation is critical to performance. Common mistakes include compressing insulation, leaving gaps around vents and lights, and failing to air seal before insulating. Compression reduces R-value significantly; a batt that is squeezed into a narrow space loses much of its insulating power. Gaps allow air to bypass the insulation entirely. Professionals use specialized equipment, such as blower doors and thermal cameras, to identify air leaks and ensure even coverage.
Professional installers also follow safety protocols. Attics can contain hazards such as exposed wiring, loose fill, and poor ventilation. Spray foam requires protective gear and proper curing conditions. A licensed contractor will ensure the job is done safely and to code, which is important for rebate eligibility and home resale. Moreover, many manufacturers warranty their insulation only when installed by a certified professional. If you install it yourself, you may void the warranty and miss out on performance guarantees.
Finally, professional installation often comes with a workmanship warranty. If something goes wrong, such as settling or moisture issues, you have recourse. DIY installations do not offer that protection. Given the relatively modest additional cost of professional labor compared to the total project, hiring a pro is usually worth it. To find qualified insulation contractors in your area, you can use USremodel's free quote service. They connect you with licensed professionals who can assess your attic and provide competitive bids.
Financing and Budgeting for Your Upgrade
If the upfront cost feels daunting, explore financing options. Many contractors offer payment plans, and some utility companies provide on-bill financing for efficiency upgrades. Home equity loans or lines of credit can also be used, though you should compare interest rates and terms. Some states offer low-interest loans for energy efficiency improvements through green banks or housing agencies. Rebates and tax credits can further reduce the net cost, so factor those in when budgeting.
Create a realistic budget that includes not only the insulation itself but also potential air sealing, removal of old insulation, and any necessary repairs. Get at least three quotes to compare pricing and scope. Be wary of lowball bids that may cut corners, such as skipping air sealing or using lower-quality materials. A detailed proposal should specify the R-value, material type, square footage, and whether air sealing is included. Ask about warranties and whether the contractor will handle rebate paperwork. With careful planning, an attic insulation upgrade can be a cost-effective way to improve comfort and reduce energy bills for years to come.
In summary, attic insulation upgrade cost and energy savings are closely linked. The right upgrade, installed professionally, can pay for itself through lower utility bills and improved comfort. By understanding your options, checking for incentives, and hiring a qualified contractor, you can make an informed decision that benefits your home and your wallet. Start by getting a professional assessment and multiple quotes, and you will be on your way to a more energy-efficient home.
Learn more about Insulation Installation or Upgrade for guides, costs, and what to expect.
Compare Insulation Installation or Upgrade Pros Near You
Enter your ZIP code to compare top-rated local professionals and request free quotes.